How to install a plugin in WordPress - installation via the admin panel
![]()
Installing a WordPress Plugin or how to install plugin in wordpress. Greetings, dear readers. We figured out how to install theme templates, now we need to move on and install the plugin. Installing plugins on the WordPress engine takes a minimum of time and does not require you to know anything more.
All you need is an understanding of this or that action, as well as care when choosing the necessary plugin. You must clearly understand what kind of plugin you are installing. Since a careless attitude to this issue. Can lead your site to slow down or worse, to a fatal error. Let's take a look at this process in more detail.
The content of the article:
- Installing a WordPress plugin - How to install a plugin in WordPress
- Installed plugins
- Plugin overview Details tab
- To manually install a plugin on a WordPress site
- Installing a plugin in WordPress via FTP
- Plugins I recommend to use
- Conclusion
Installing a WordPress plugin - How to install a plugin in WordPress
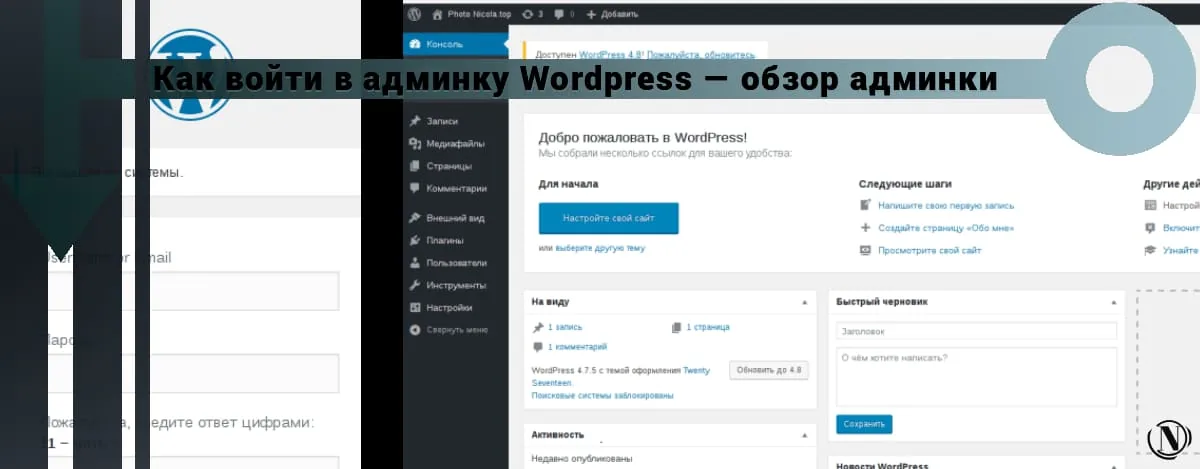
First you need to log into the admin panel. Then select the "Plugins" tab in the left menu. The following window will open in front of you:

As we can see in the image, the tabs for adding a new plugin are indicated. This window also displays installed plugins on your site. It performs the necessary actions with plugins, such as “Remove”, “Deactivate”, “Parameters”, “Details”, “Activate”.
By default, a couple of plugins are already present in your installation, one of the plugins can be removed. It is charitable and has no influence on the site. The next step for you is to click on “Add New”. The corresponding window will open in front of you:
Consider this window!
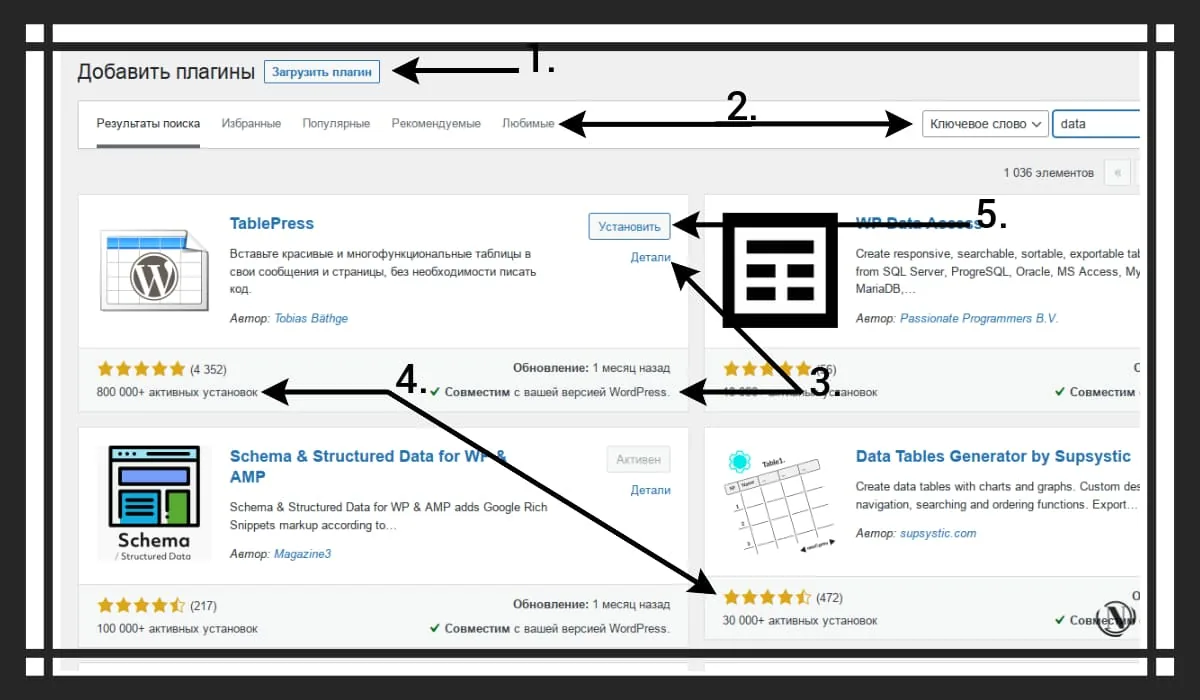
1. Button “Load Plugin” - Responsible for manually uploading plugins to the site. If, for example, you have a preloaded archive. Then this download is just for you! Click on this button, then in the corresponding window specify the path to the plugin archive you need and the installation will start automatically.
2. Plugin search bar and tabs - here you can specify the name of the plugin you are looking for. I recommend entering the names in strict accordance with the original and in the same language. In this case, the search will be the most successful, otherwise the search will not find anything. Also on the opposite side, you can see the tabs (favorites, popular, recommended and favorite). I think you understand everything with them, look at their results, sometimes you can find useful plugins.
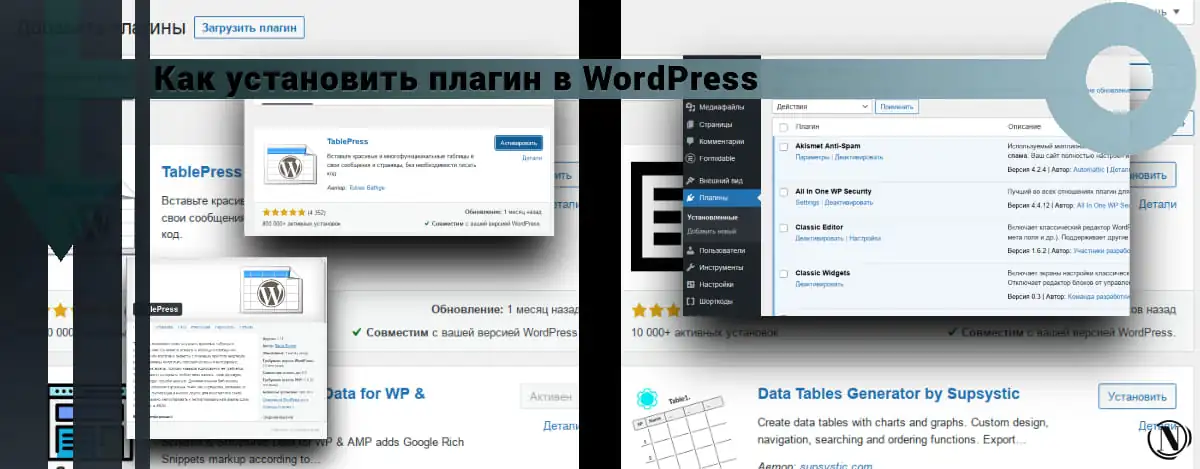
3. An example would be setting “TablePress” is a plugin for easy installation of beautiful tables in your article. Pay attention to the following elements: Details - responsible for the annotation to the plugin (it contains a full description). Compatibility with your version of WordPress is an important element if the plugin is not compatible with your version of the engine. That accordingly there is a minimum probability that he will refuse to work.
4. Rating stars - a very visual display of the quality of the plugin. The more stars and downloads, the better. Although in some cases, this is not entirely true.
5. Install button - click and install the required plugin. The image below shows the installation process.

Next, activate the installed plugin: see the image below.

Installed plugins
In order to view the installed plugins on your site, you need to follow these steps. In the left menu of the window, click on “Plugins” - after that you will see the corresponding window of the “Installed” section. See image below:

As you can see, our plugin is installed and tells us that we need to register it. Consider the functions of this window in more detail:
- Settings - responsible for the plugin settings. By clicking on this link you will be taken to the settings of the corresponding plugin.
- Deactivate - if the plugin does not meet your expectations, you can disable it by clicking on the link.
- Remove - allows you to remove an unnecessary plugin.
- Actions - the tab is located at the very bottom of the page and has the following functions: activate, deactivate, delete. For these actions, you need to check the box next to the corresponding plugin. Then select the required action from the drop-down menu. Then click apply!
Note: You cannot remove an activated plugin. To remove a plugin, you must deactivate it.
Plugin Overview - Details

This is how the plugin details window looks like. As you can see, it contains all the necessary background information. Consider:
1. Tabs responsible for information about the plugin. For example, in this window, there is no “Images” tab.
- Description - a brief description of the plugin, also contains information about the latest updates and changes.
- Installation — instructions for installing the plugin.
- Changes and questions - contains a full description of the changes since the last update, the adjacent one contains frequently asked questions.
- Reviews - the tab contains user reviews. Useful for reference. I look at the reviews, as in some cases users indicate a negative attitude towards the work of the plugin. A very handy thing for comparing several plugins of the same direction.
- Image - contains images, in some cases a very necessary thing. Especially if the plugin affects the visual component of your site.
- Average rating - I already wrote about asterisks. So here is the main rating, based on ratings on a 5-point scale. Where 5 (excellent) 1 (terrible). The more upvotes, the better. I recommend still relying on all three components of rating, reviews and number of downloads.
- The “Install” button is in the very bottom right corner, click and install!
To manually install a plugin on a WordPress site:
1. Download the desired plugin as a .zip file from the WordPress directory or from a third party source (not recommended). If you are downloading from a third party website, make sure the plugin developer is legit.
2. On the WordPress dashboard, select Plugins > Add New.
3. Click Upload Plugin at the top of the page. see picture below

5. After installation is complete, click Activate plugin.
Installing a plugin in WordPress via FTP:
1. Download the desired plugin as a .zip file from the WordPress directory or from a third party source.
2. Extract (or unzip) the plugin file. The unzipped folder will appear with the same name as the ZIP file.
3. Next, you need to connect to the server of your WordPress site using FTP. To do this, you can use an FTP client that connects to a host server to transfer files. If you have a hosting panel installed on your own server, then use its data transfer tab to the server.
4. After you open the FTP client, connect to your website using your username and password. You will most likely need to obtain these credentials from your hosting provider. See image below:

5. In the WordPress files directory, open the wp-content folder, then open the plugins folder.
6. Upload the unpacked plugin folder you downloaded to your plugins folder.

7. Return to the WordPress Dashboard and select Plugins > Installed Plugins. Find the new plugin and click Activate.
Plugins I recommend to use
In this section of the guide, I will talk about the plugins that I personally use. There are not a huge number of them, but the functionality wins back to the fullest.
- Akismet Anti-Spam is everyone's favorite anti-spam plugin pre-installed by the WordPress developers. Great starter solution for comment spam protection. Be sure to leave it.
- All In One WP Security is a popular and very effective WordPress security plugin. It has excellent functionality: protecting the logging page, changing the login page, protecting files and folders on the site, protecting site directories, copy protection, spam protection and much more. There are a lot of functions, in the future I will talk about it in detail.
- Classic Editor - I do not like to use the block editor, it is not convenient for me. So I installed a plugin to switch to the classic WordPress editor. By the way, in the next guide I will tell you how to make a page in WordPress, just in the classic editor.
- Classic Widgets - similar to the editor, allows you to return the classic mode of placing widgets on the site.
- Cookies and Content Security Policy - an excellent plugin for compliance with site security rules, places the headings of site security rules in the site header. They allow or prohibit a particular resource from performing certain actions on your site. Also displays a cookie alert for site visitors.
- Formidable Forms - I use this plugin for the contact page, you can make any form on the site with it.
- Header and Footer Scripts is a good plugin, though it is not updated. There may be alternatives, but for now it suits me. This plugin integrates into editors and allows you to place the necessary code for the article in the header. For example I use to post meta (question and answer).
- MalCare is another security suite for WordPress. Comprehensive online protection in real time, as well as checking the site for viruses.
- Minify HTML is an HTML optimization plugin that minifies HTML, JS and CSS. Removes extra comments and spaces in the code.
- Perfmatters is a lightweight performance plugin designed to speed up your WordPress site. Super solution for optimization, removes everything superfluous, there is a preload, lazy loading. A lot of useful features.
- Sassy Social Share is a good solution for organizing social sharing buttons on your website.
- Schema & Structured Data for WP & AMP - adds a set of structured data to your site.
- SSL Insecure Content Fixer - Clean up insecure HTTPS content on a WordPress site. Fully justifies itself, making your site even more secure.
- Webcraftic Cyrlitera - transliteration of links and file names - I use it only for transliteration of links on the site.
- WebP Express - Adds features for displaying images in the next generation WebP format. It also converts your existing images to a new format, has many settings and conversion methods. It depends on the server you are using.
- Wordfence Security is also a security plugin, a huge advantage is the scheduled virus scan. A huge number of add-ons, and the biggest plus is two-factor authentication.
- WP Rocket is also a powerful site optimization suite, also has database optimization functionality.
- Yoast SEO Premium is an indispensable solution for promoting your site in search engines.
- Shortcodes - allows you to insert a variety of shortcodes into your texts on the site.
- Yandex.Turbo - generates a feed (rss) site feed for Yandex. Allowing you to connect turbo pages.
I hope this selection will be useful to you.
Conclusion
It is worth considering the features of all plugins, as they may conflict with themselves. A conflict can even arise with your theme template. Therefore, I highly recommend testing them on a separate installation of the WordPress engine. Do not forget to pre-configure permalinks on the site (CNC). Create pages and add posts to the site. All this will help you to check the work of plugins and themes.
It's not worth risking your site, you never know what can happen! My article is complete. Hope it was interesting. All the best to you and success in installing plugins.
Reading this article:
- How to easily recover a hacked site? (Complete guide)
- Installing Themes in WordPress - How to Install a Theme in WordPress
Thanks for reading: SEO HELPER | NICOLA.TOP