Installing Debian 9.1 Stretch step by step guide
![]()

Greetings Friends! Today I will talk about Debian 9.1 Stretch distribution. This is one of the updates to the stable release of Debian 9. It has exceeded the expectations of many webmasters as it has undergone significant changes. One of these innovations was the move to MariaDB, which significantly improves the quality of this distribution.
I would like to note that at the moment Debian 9.1 already includes more than 51 thousand packages. Recent releases are characterized by significant stability in operation. And this, as many people know, is a key factor for using this OS in the server direction.
Increased stability is one of the most important factors when choosing an OS for a server. In this guide, I will cover how to install Debian 9.1 Stretch to a computer or laptop. For subsequent configuration and installation of software for the server. This guide is the key for now! Therefore, I decided to describe the installation process in more detail.
The content of the article:
- Preparing to Install Debian 9.1 OS
- Burning an ISO image to media
- Installing Debian 9.1 from a flash drive
- System language priority
- Location parameter
- Keyboard layout
- Configuring network settings
- Setting up the superuser root
- Setting up a standard user account
- Disk partitioning
- Root disk partition
- Partition swap file
- Create a home partition
- Completing disk partitioning
- Base system installation
- Installing the GRUB bootloader
- Conclusion
Preparing to Install Debian 9.1 OS
At this point, you need to visit the official website debian.org. Where you can choose a stable release and the required image architecture to download. The developers have taken care of different download options, you just have to choose from the CD, DVD, ISO image, network download, etc. you like.

The updated Debian 9.1 distribution, can be downloaded from the main page of the official website. In the upper right corner there is a link to download a 64-bit iso image for a PC or laptop. See image below:

If you need more information, there is a detailed guide on the site. It describes a lot of terms and different options for the entire system installation process. The downside is that it will take you quite a lot of time to view all the content. See image below:

After you have read all the necessary information on the site and downloaded the desired image. You need to burn it to media.
Burning an ISO image to media
Now one of the most convenient and popular methods is to write an image to a USB flash drive. This can be done quite simply and quickly. Use any program suitable for this purpose. I recommend a simple rufus program:

After successfully writing the image to a USB flash drive, all that remains is to configure the BIOS. Here you can do it without me, there are no differences from installing from a disk. You just need to select the device from which the download will go. In our case, this is a flash drive “floppy draw“. After that, we move on to the next step.
Installing Debian 9.1 from a flash drive
After downloading the installation image, you will see the corresponding interface. In some cases, it may be slightly different! But the process itself remained unchanged. At this stage, you need to select the installation method: Graphical install

Next are the first settings.
System language priority
At this point, you need to select the desired language for your Debian system. Those who find it more convenient to work with the English version of the system can choose the corresponding language as a priority. For most, Russian is suitable:

Location parameter
In this window, you must specify your location in order to correctly set the time zone. I indicate the Russian Federation. You specify yours! See image below:

Keyboard layout
Here, select the desired keyboard layout language, then you should choose to switch between languages. The combination of keys that will be convenient for you.


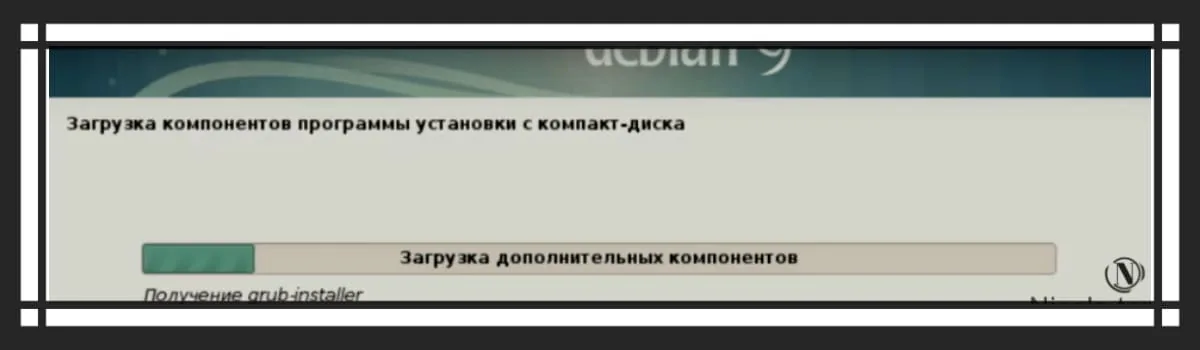
Next, we wait for the necessary installation components to be loaded from the CD and the subsequent configuration of the network parameters. It will take some time.

Configuring network settings
At this stage, you must specify a computer name that will identify your system on the network.

Then you need to specify the domain. If your computer does not have a network domain, this field can be left blank. If you have a domain for these purposes, please enter it here.

Superuser root settings
In this window, you need to enter the root password, then repeat it:

Setting up a standard user account
Think of and enter a username to be used instead of the root superuser:

Next, enter the username. In most cases, use the name from the previous window:

Specify and repeat the password for subsequent login:

Wait for the components to load:

Disk partitioning
For most users who install the system on a blank disk. An automatic marking method will do. In this case, the system itself will create the necessary table and partitions. I discussed this method in a previous article using the example of installing Debian 8. In this guide, we will look at manually partitioning disks. You need to select the line manually:

Here is a list of partitions, select the partition where Debian 9 will be installed. The choice must be made based on the image. After that, the system will create an empty partition table for further work:

Click yes to decide whether to create a new partition table. In this case, the system will create a new partition table:

For we will create the first partition for the bootloader. This is required when using LVM. Here you need to select an empty seat:

Then click: Create a new section

Specify the required size in the field, in my case the partition size will be 500MB:

Select partition type Primary:

Set the position of the new partition to the beginning of the disk:

In the section settings, click on “Mount point” and select: /boot - static bootloader files.


Next, select the file system, specify "ext2”

In the section parameters, click on “Registered units” and set the value to 0%.


Next, click on “Label” and enter the value in it boot:


Then you should enable the partition as bootable and select "Partition configuration is complete." See image below:


So we have created the first partition of the disk. Do not rejoice, as we need to create a few more partitions.
Root disk partition
Let's create the following section "Root“. Creating a new section is similar to the previous one. Only with other meanings.

Create a new section:

Specify the size for the 10GB partition:

Type: Boolean

Location: Start

Select and specify the file system: Ext4


Finishing up the section.

Partition swap file
The next section will be “swap file“. Creating a partition is also similar to the previous sections:


Set partition size: 1000MB

Partition Type: Boolean

Section Location: Home

Select the "Use as" menu item. From the drop-down menu, choose to use the partition as a swap file. Then complete the configuration of this section.


Create a home partition
The next mount point is the home partition, /home. It is created in the same way as other sections. The only thing that can be added is the choice of the file system. NTFS or FAT is up to you.


Specify the maximum size: All remaining free space. Partition type, specify logical. Reserved blocks are written in field 0%.


Here you need to select the “Label” parameter in the menu item, for subsequent changes.

Next, enter the section label in the field: home


Completing disk partitioning
We have finished partitioning the disks, to apply the new table, click on “Finish partitioning and write changes to disk“. Then click on "Yes" to write the changes to disk.


Wait for partition formatting to complete:

Base system installation
Here you need to wait for the installation process of the base system to complete.

Then check "no" and click "continue". Wait for additional software to download.


Setting up the popularity-content package to send anonymous reports of Debian 9.1 usage. We put "no" and continue to download the software for selecting packages.


In this window, you need to select the following packages: Debian Desktop Environment, Gnome, SSH Server, and Standard System Utilities. Next, you should wait for the installation of this software to complete.


Installing the GRUB bootloader
We are moving on to complete the installation of Debian 9.1. The last steps remain. Wait for the GRUB installer to load!

Agree to install bootloader:

Select the desired partition for GRUB and wait for the installation process to complete:


This is followed by completion, it will take a fraction of a second. After Debian 9.1 will show you the appropriate notification.


The very last step)) Log in with your credentials! You will see a desktop and a fully functional working system.

Conclusion
As you can see, the installation process of this operating system is quite simple. Especially if you use a suitable illustrated manual. I think now you understand how to install Debian 9.1 through the graphical interface. Of course, if you install Debian 9 on a non-graphical server. In this case, you will need to follow all the same steps. In my case it is more convenient to use this method. I wish you success with your installation. In the next tutorial, I'll show you how to install Debian 10, or Debian 11, set up Debian 9.1, and install a hosting panel on that system.
Reading this article:
Thanks for reading: SEO HELPER | NICOLA.TOP


After installing Debian 9, I ran into a problem, all hard disk partitions, except for swap, contain an error. This was found out when creating an image of the installed system in Acronis True Image. as a result, Acronis refused to create a regular system image and created it only in sector-by-sector mode. When viewing a hard drive in Paragon Disk Manager, these partitions are shown as unallocated. In Debian 8, neither Acronis nor Paragon has this problem, the partitions are shown as ext4 formatted.
Hello, if you have installed Debian 9.1 from this article. Then try using a different image burning program. But judging by what I see in the metric, you came in with a problem. In this case, as options: Use another program to burn the image, use the installation analogy as debian 8. If you install the system in manual mode, then try the one suggested by the system.
Either way, in my opinion. The problem lies precisely in the recording of the image. And it is precisely because of this that incorrect layout and formatting of disk partitions occurs. Use the rufus burner provided in the article.
The system was installed both from a flash drive and from a CD. The CD was recorded using nero, the flash drive was also recorded by rufus in two modes of ISO - image and DD - image and using UltraISO. Run all programs as administrator. The result does not change. The same problem exists in Ubuntu 17 and Mint18.2 x64. Today I reinstalled Debian 9. I installed it on other file systems: boot partition (/boot) - ext2, root partition (/) and home (/home) - ext3. There is no file system error. Previously used ext4 file system.
Victor, thank you for your comment. Perhaps it will be useful to other readers. I believe the installation went well. Perhaps this is a glitch in the latest Debian 9 distributions, and not everyone has an Ext4 file system.
The problem was solved unexpectedly. As usual, I re-downloaded the Debian 9.1 image for installation over the network, as usual (did not philosophize) wrote it to a USB flash drive. Installed on a hard drive with a breakdown into the following sections: 1. Boot (/ boot ext2), 2. Root (/ ext3), 3. SWAP, 4. Home (/ home ext3). I wanted to experiment with other file systems, I didn’t find how to do it “on the run”. At first I installed using a Russian mirror, only the download of files lasted more than six!!! hours and, in the end, was interrupted, changed the mirror (to Turkish) and the download went sooooo much more fun, however, during the reboot, the computer hung for more than half an hour and did not respond to pressing any keys and their combinations. I rebooted, “through the knee”, the system booted up, everything went fine, but it was not possible to set up the network, in particular, the system does not see its resources, even its computer, other computers and their resources sees normally. After suffering for several hours, I repeated the installation, now immediately using the Turkish mirror, the download of the same files took place in 15 minutes, the installation went as usual, there were no freezes. I re-configured and it worked. For the record, I saved the image of the freshly installed system in Acronis True Image, everything went smoothly, there were no file system errors (previously, when using ext4, there was a file system error in all partitions except SWAP, and Paragon Disk Manager saw these partitions as unallocated ). If it will be useful to someone, I will be very glad.
Another problem that I can’t solve for several years is I can’t set up remote desktop control using the vnc protocol. I have Debian 7.11 x64 installed on my home server and home theater, it works great, but support is ending. In fact, there is nothing to replace it. So far, only Mint 18 supports network desktop management, but only from Linux, and from Windows, only Debian 7 has been configured. If anyone has solved this problem, please share your experience. Nikolay.
Victor) Thank you so much for such a long comment. In the future, if you decide, just write a post on your profile. Thus, you will quickly find answers to questions and help many readers of the site. Yes! And it will be much more convenient for you to track the answers. The posting form is in your profile. You can also add: your photo and profile pictures.
On this issue, I will try to find information for you. But it will not be in the near future, a lot of work with filling the site. I write articles myself, combining with my daily work.
Once again (hopefully the last one) I tried to install Debian 9, and again “big bummer”. This time the system flatly refused to work on the network. Oddly enough, the Internet works, but does not see the local network. When you try to connect, displays the message "Unable to connect to "/"". I configured the network both automatically, via DHCP and manually, through the applet and through the terminal. The result is the same, the subnet mask “falls” from 255.255.255.0 to 24. I reboot into Mint 18.2, or Windows 10, everything works. I tried to install Debian 9 dozens of times and in all cases this process ended with the crash of the system and many hours of restoring the health of other operating systems. Now I have Windows 10 Pro x64 installed on one hard drive, Mint 18.2 x64 xfce on the other, Debian 9 on the third, took it to hell!!! And for a day I restored the structure of the hard drive, after Debian. No way could I collect “in one heap” scraps of unformatted partitions. I ran into another problem when I wanted to install WPS Office instead of the very inconvenient Libre Office. Firstly, it is a very difficult task to correctly remove Libre Office, and secondly, WPS Office simply does not start, its splash screen appears for a short time and that's it. Everything works in Mint, the only negative is that it is impossible to control the desktop remotely from Windows. And, traditionally for all Debian-based systems, the Wi Fi adapter driver is not installed. What is interesting in Ubuntu Wi Fi adapter is “picked up” at the stage of system installation, and it is also based on Debian. Given the above, I'm leaving Debian in favor of Mint. I'll be back when I get the urge to do masochism again. As for the home server and home theater, when the problems with Debian 7 start, I'm sorry to transfer them to Mint.
PS: I am writing this comment from Mint.
Hello Nicholas, thanks for your reply.
For your question:
1. Why do you need a third system, on one device. Especially under different file systems. This can provoke a conflict, I am personally only familiar with the possibility of installing two OS on one PC.
2. There are a lot of articles on setting up a network in Debian in the search. I myself use Debian 8.5 and set up the network only on the second try. By analogy with a suitable guide from the search. Problems can be different, incorrect actions, parameters are incorrectly written. Tritely did not reboot the system. There may be different options here.
3. The relevance of the lack of a Wi Fi driver is also present in this version of the distribution. It really is.
4. There are no programs for managing the Debian desktop, and most likely there will not be.
Why is that?
For starters, the Debian OS is more focused on server support, like many other similar OSes. It is chosen solely because of the minimum set of programs that provides fairly good performance. And accordingly, many admins do not need a desktop at all. And all the necessary actions can be performed through the console. Or remotely, for example, through the Putty program. You can also access the server itself easily through the ftp client, even through the mobile application.
From my experience I will say:
It took me about 2 months to create a server on Debian. I reinstalled the system 30 times. In the end, I managed to create exactly what I needed. And by the way, this site just works on Dedian, with support for Nginx-apache, php7.1, mariadb. I am very pleased with the performance, there have been no failures for more than 3 months. All updates of system components are going with a bang. And I note that when using the Vestacp panel, few people manage to install such components the first time.
Try experimenting, maybe you missed something.
1. I install the third system for testing, I'm looking for a replacement system on my home server. All three systems are located on different physical disks and, in principle, do not depend on each other, except through a local network, by manually mounting their resources, or through fstab. Minor problems, such as a 4-hour time jump, are solved by editing the /etc/default/rcS file, in it you need to replace UTC=yes with UTC=no, and in most systems this problem is solved. It didn't work in Mint 18.2, but it doesn't bother me much. By the way, it is Mint that I cook, if necessary, on a home server, a very predictable system.
2. Network problems exist on all Debian systems. The first time I installed Debian 6 on a fairly old dual core e5300 computer, I was delighted with how it worked. I assembled a new computer on a core I7 2600 and could not configure the network card. Nothing helped, neither the driver for Linux from the manufacturer, nor the proprietary one downloaded from the Internet, the system simply does not see the Atheros AR8151 network card. I temporarily solved the problem by installing an additional Realtek network card. After the release of Debian 7, this problem remained until version 7.5, then the additional network card was said goodbye. It's just very incomprehensible why Debian behaves so unpredictably, after one installation everything seems to be fine, the network works. I kill the system with fruitless attempts to configure, I install the same system again, on the same disk with the same (up to the letter) parameters, and I cannot configure the network. What immediately caught my eye was that after setting the netmask 255.255.255.0 subnet mask “falls” to netmask 24, perhaps it is because of this that the network does not work, but it is impossible to return the netmask back. Did Debian 9.1 solve this problem? reinstalling the system from an old Debian 9.0 distribution, until I upgrade the system, I'm afraid that I will kill the network.
3. Interestingly, the old Debian 7 system “saw” a very outdated D-Link 54Mbps Wi Fi adapter, but it does not see newer ones, and Ubuntu picks it up at the initial stage of system installation, and any one.
4. I have been running a home server on Debian 7 for the sixth year and a home theater for the second year. They are controlled remotely using the vino application via the vnc protocol, from Windows, via VNC Viewer 5.0, from Linux, via Remmina. Why the developers removed this feature from subsequent versions, I don’t understand.
I will use Debian 7 to the last opportunity, just a system that is unique in stability, for more than five years not a single failure, a couple of years ago I changed the motherboard, processor, memory, and even minimal settings were not required. Nikolay.
Hello Nikolay. Based on what you write. I can conclude that the installation and configuration of the system was successful. And I see contradictions in your comments. Since in the last comment, you stubbornly condemned this system. In this, on the contrary, you agree with many of my arguments on Debian. I believe that past comments were written in a fit of anger) I'm glad that you did it, test it.