How to install Debian 11 (Bullseye) step by step guide
![]()
Last year, the updated Debian 11 Bullseye distribution was released. Installing Debian 11 Bullseye, is carried out by the same method as previous releases of this OS. Debian has become the basis for most distributions of the Linux family. This operating system is the most convenient and secure for server administration.
It is important to know which updates the release has undergone. The distribution update took place on March 26, 2022. This is currently the latest stable version of Debian 11.3 Bullseye. The security system of this version will be supported by the development team for about 5 more years.
This distribution has updated the list of supported architectures, here is the extract: 64-bit (amd64), 64-bit ARM, EABI ARM (armel), ABI ARM with hardware support (armhf), 32-bit (i386), MIPS, 64-bit MIPS, POWER processors, IBM System z. A total of nine architectures are supported in this release.
Debian 11 bullseye
also has updated graphical desktop environments: Gnome 3.38, KDE Plasma 5.20, LXDE 11, LXQt 0.16, MATE 1.24, Xfce 4.16.
The latest stable distribution of Debian 11.3 has over 72% updated packages, totaling over 59,000 packages in the release. Added more than 11 thousand new packages, removed about 9 thousand obsolete
packages.
The update affected the following packages in the assembly: Apache 2.4.48, BIND DNS Server 9.16, Calligra 3.2, Cryptsetup 2.3, Emacs 27.1, GIMP 2.10.22, GNU Compiler Collection 10.2, GnuPG 2.2.20, Inkscape 1.0.2, LibreOffice 7.0, Linux kernel 5.10 series, MariaDB 10.5 , OpenSSH 8.4p1, Perl 5.32, PHP 7.4, PostgreSQL 13, Python 3, 3.9.1, Rustc 1.48, Samba 4.13, Vim 8.2. Among other things, the system has changed the structure of the security layout, improved support for verification algorithms and yescrypt protection.
Updated language translations for text and graphic shells: OC is now available in 76 languages and supports Japanese, Chinese and Thai characters.
Debian 11 system requirements are as follows:
- CPU: dual-core 32-bit or 64-bit processor, or higher;
- RAM: 2 GB or more;
- Storage device: 15 GB.
As we see there are a lot of changes, other distributions will be created based on these changes.
Important: you need to understand that this is not the last release of this operating system. The next issue will be called
bookworm, it is currently being tested. The release will be out very soon, keep that in mind.
Now, let's jump right into the Debian 11 Bullseye installation. In this guide, I will show you how to install Debian 11 on a PC, laptop or server hardware. After that, it will be possible to perform basic configuration and installation of additional software for the server.
The content of the article:
- Preparing to Install Debian 10 OS
- Burning an ISO image to media
- Installing Debian 11 from a flash drive
- Priority system installation language
- Location parameter
- Keyboard layout
- Configuring network settings hostname and domain
- Setting the root password / root user in Debian
- Setting up a standard user account
- Partitioning disks choosing a partitioning method
- Base system installation
- Installing the GRUB bootloader
- Conclusion
Preparing to Install Debian 10 OS
In this step, we have to visit the official website debian.org as usual. On the site, we select the release we are interested in and the architecture of the installation image to download. Latest stable release, available from the main page of the official site. You can download the distribution image in standard ways: CD or DVD, ISO image, network download and Life install.
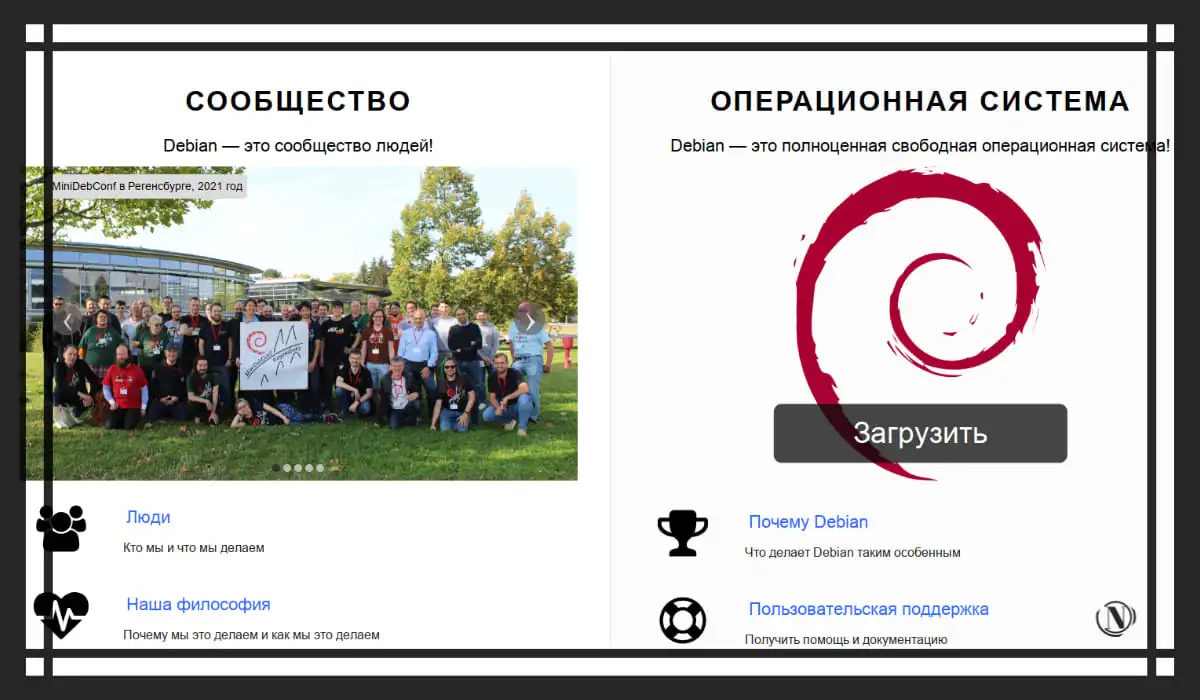
In case you are interested in other stable releases. I recommend visiting the official Debian site. Previous releases of stable distributions can be found in the releases (other releases) section, select the stable version of the distribution you need from those offered. See image below.

In this guide, I describe an example installation using an ISO image. Therefore, download the installation ISO image from the official source. This will be followed by writing the installation image to a flash drive.
Burning Debian 11 Iso Image Bullseye
to media
The most popular way to mount an ISO image to media is a flash drive. You can use any convenient program to mount the ISO image. Here are the program options for burning an ISO image to a USB flash drive:
- Unetbootin.
- Etcher.
- Rufus.
These are the most popular free programs that are available on the Internet under Windows. All of them are easy to use, and have the tools we need to mount a Debian distribution ISO image onto a flash drive. Use the Rufus program in this case, the program is easy to use. With it, it will not be difficult for you to write a Debian image to a USB flash drive. See image below:
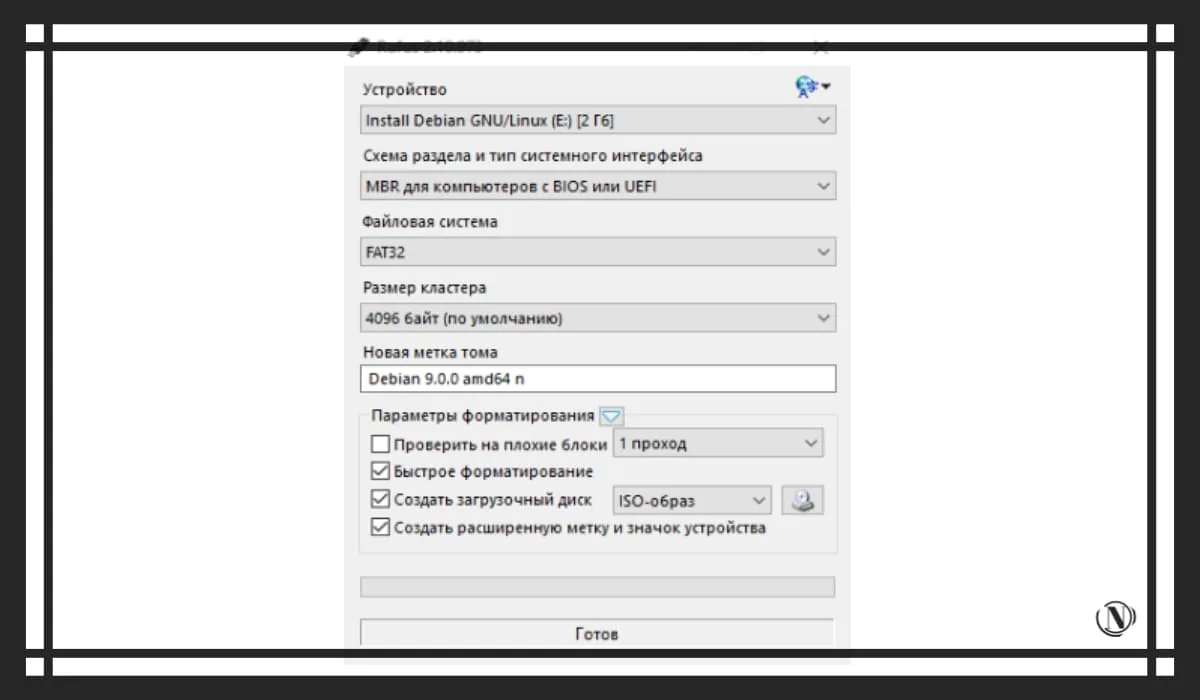
You have mounted the Debian 11 installer ISO on a flash drive. Next, you should reboot the machine on which the OS will be installed.
Installing Debian 11 from a flash drive
After the reboot, you need to make changes in the BIOS. Such edits are needed to boot the system not from a hard disk, but from bootable media, in our case, from a USB flash drive. In the BIOS, you need to rearrange the value to "floppy draw". After, insert the USB flash drive and reboot the machine. After you will see a graphical shell of the installation program.
At this stage, you need to select the interface of the OS installation process. Two options are offered console (Install), and (Graphical Install) installer. See image below:
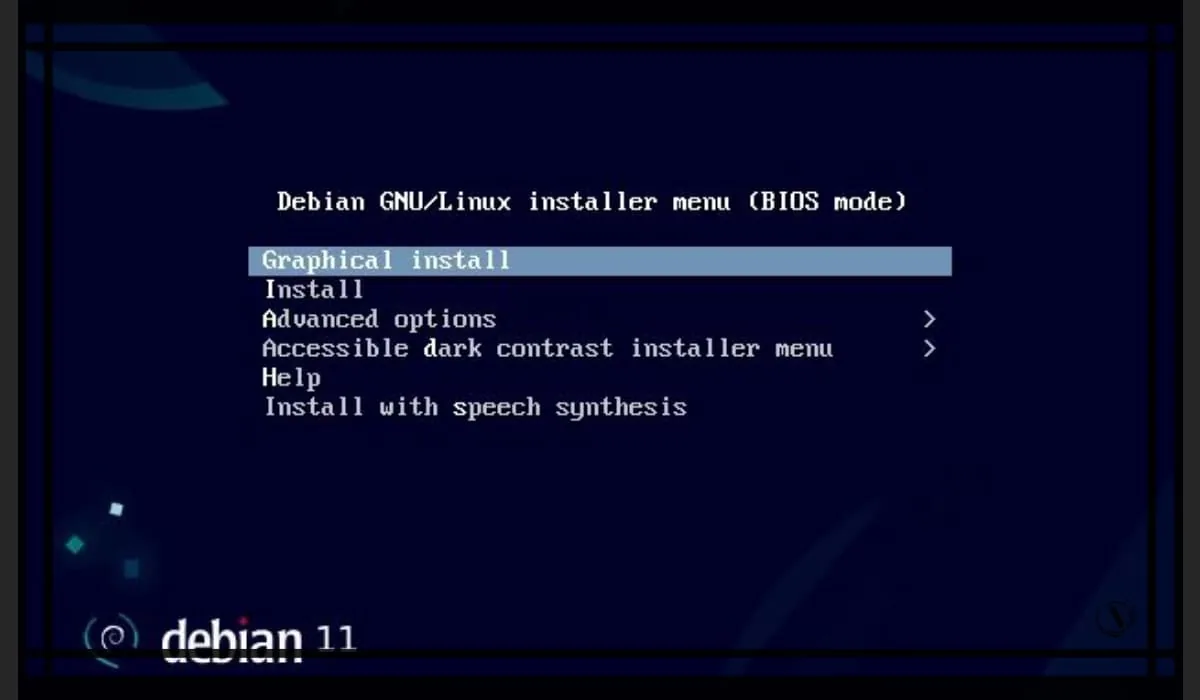
Select graphical installation mode Graphical Install and click on enter.
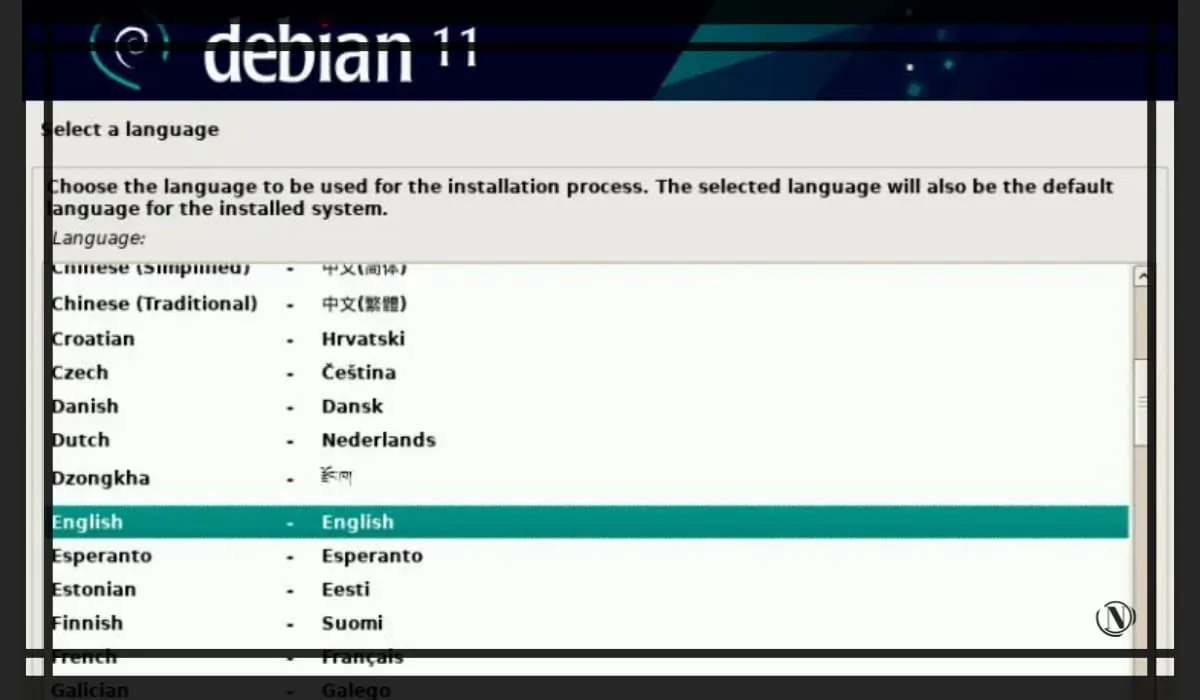
Priority system installation language
Here, we choose at our discretion, someone is English, someone is Russian. After selecting your preferred installation language, click Continue.
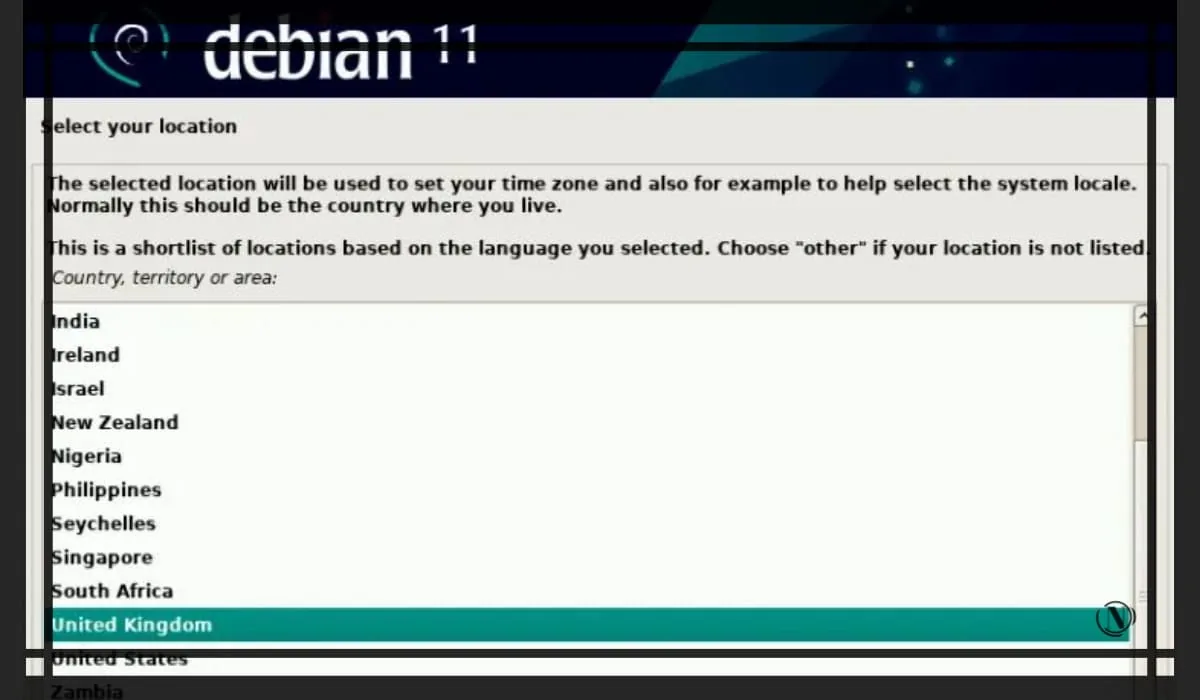
Location parameter
Here, we choose the preferred location, it will determine the time zone of your system. Once selected, click Continue.
Keyboard layout
At this point, select your preferred keyboard layout language. Once selected, click Continue.
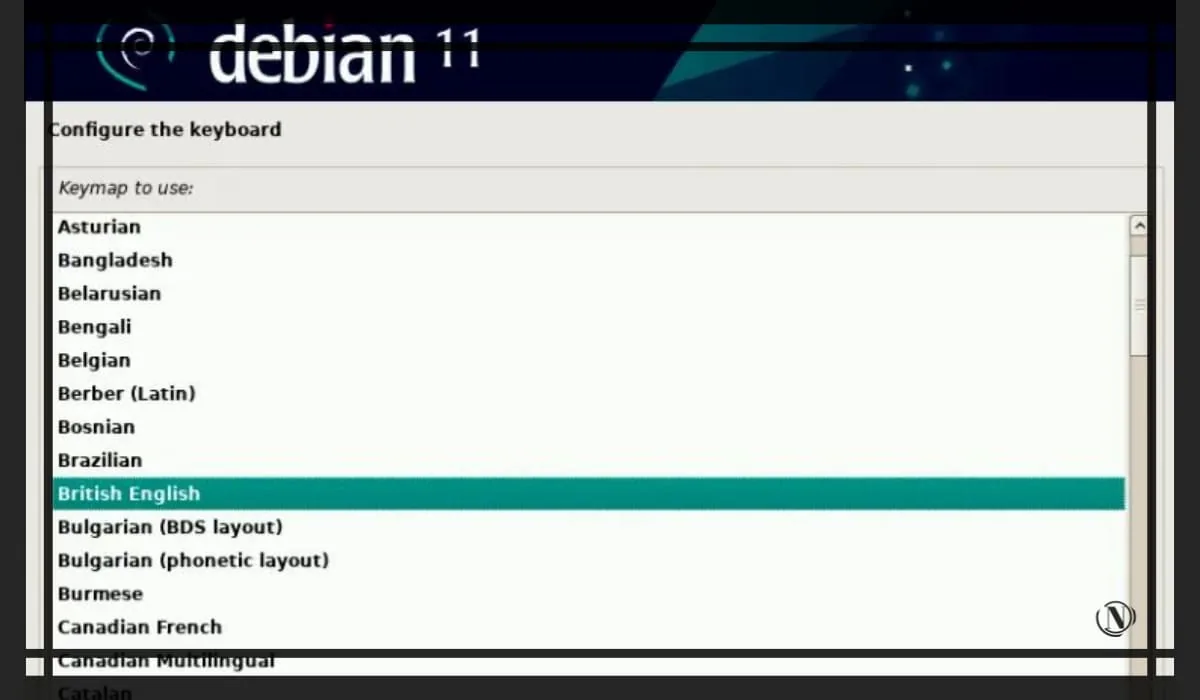
Note: By default, switching between languages in Debian is done with the Alt+Shift key combination.
Next, you will need to wait a bit, the installation program will attempt to automatically configure the network.
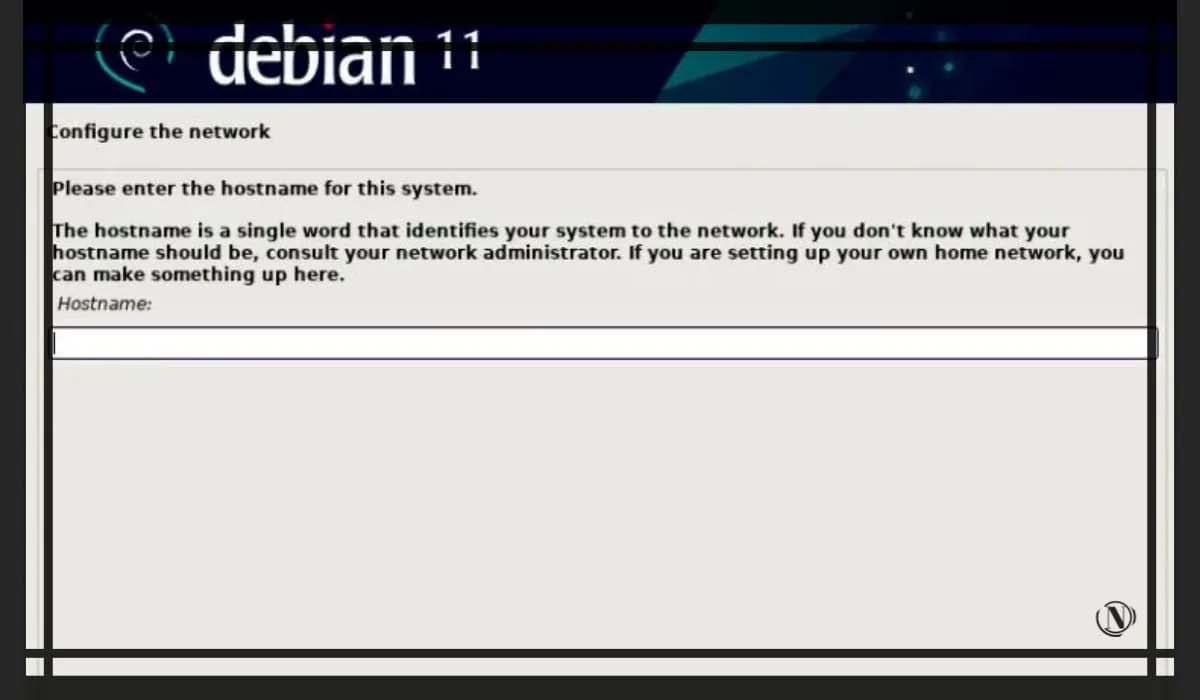
Configuring network settings hostname and domain
The network setup stage, after the installation has determined your network interface, it must be selected as a priority. Next, you will see a window for entering the name Hostname. Here you need to register the host name (computer) and click "Continue".
In the next window, the installer will ask you to enter a domain name. In some cases, the installation may detect the domain automatically, follow the action and click "Continue"
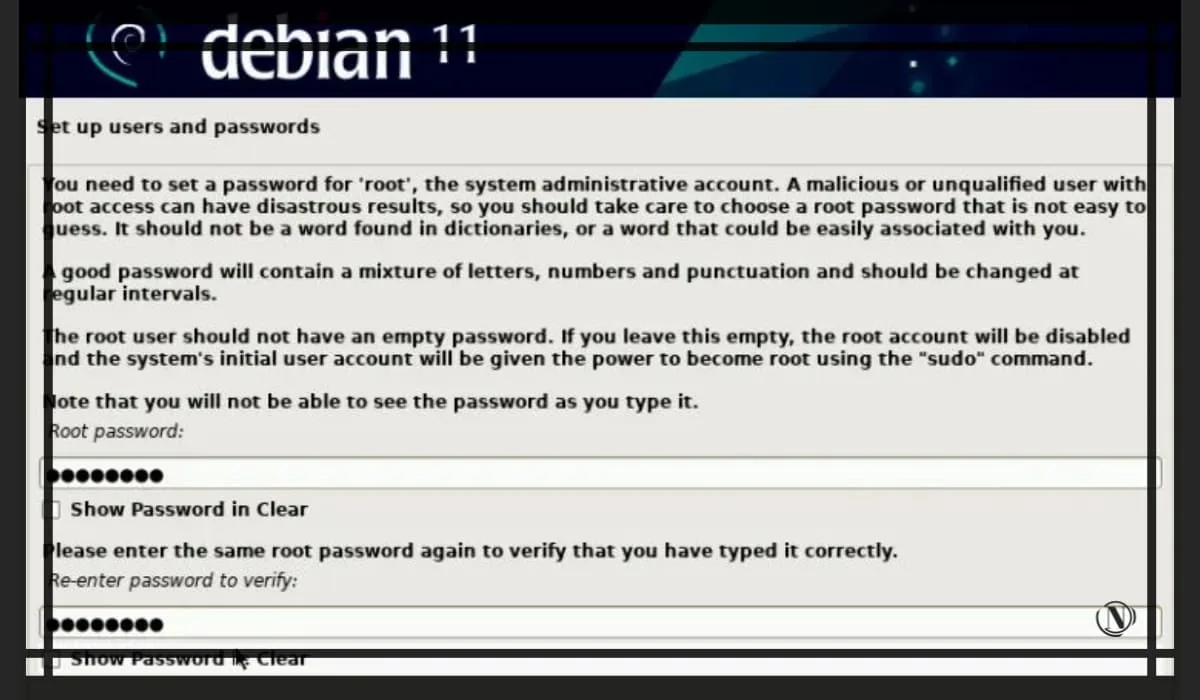
Setting the root password / root user in Debian
In this window, enter the password for the root superuser and click "Continue"
Setting up a standard user account and password
This is the stage of creating an account with simple (limited) rights. Enter a username of your choice in this window. Click Continue.
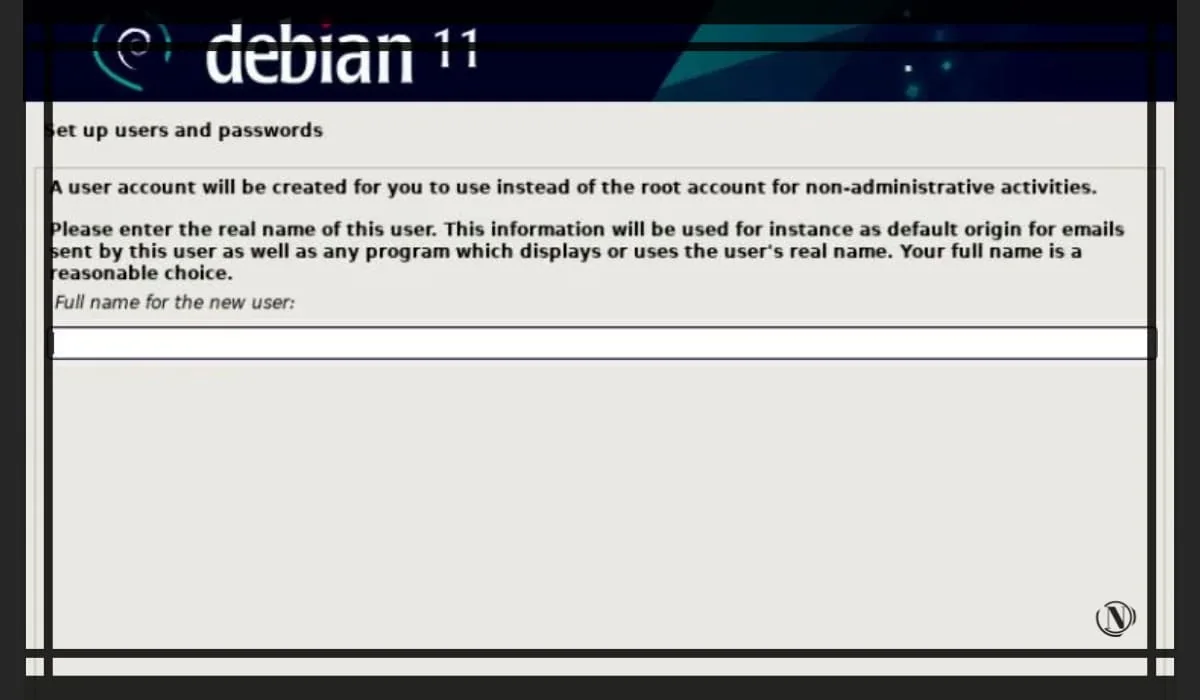
In the next window, enter the password for the local user and also click Continue.
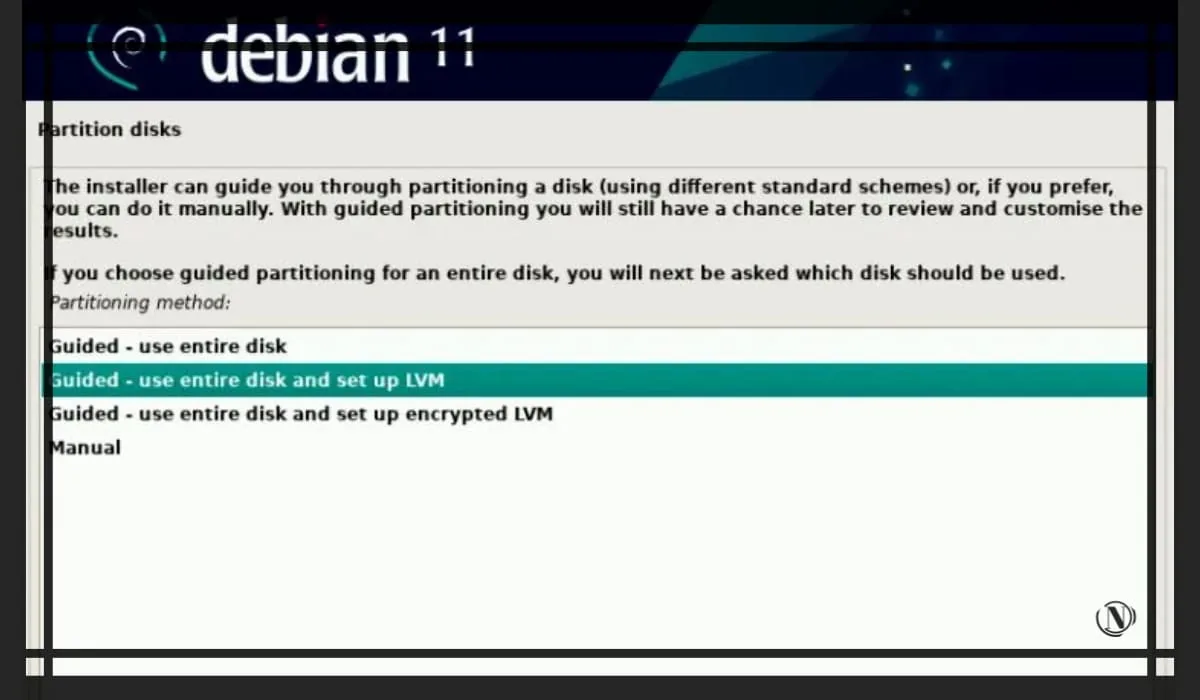
Partitioning disks choosing a partitioning method
At this point, the installer will prompt you to select a method for partitioning the disk:
- use the entire disk (automatic creation of a partition on the entire disk);
- use the entire disk and set up LVM (an LVM-based partition is automatically created on the entire disk);
- use the entire disk and set up encrypted LVM (will create partitions based on LVM and encrypt the disk);
- manual method, allows you to create your own custom partitions.
Choose the option that suits your setup, I'll stick with the second option. This method will create LVM based partitions on the entire drive. See image below:
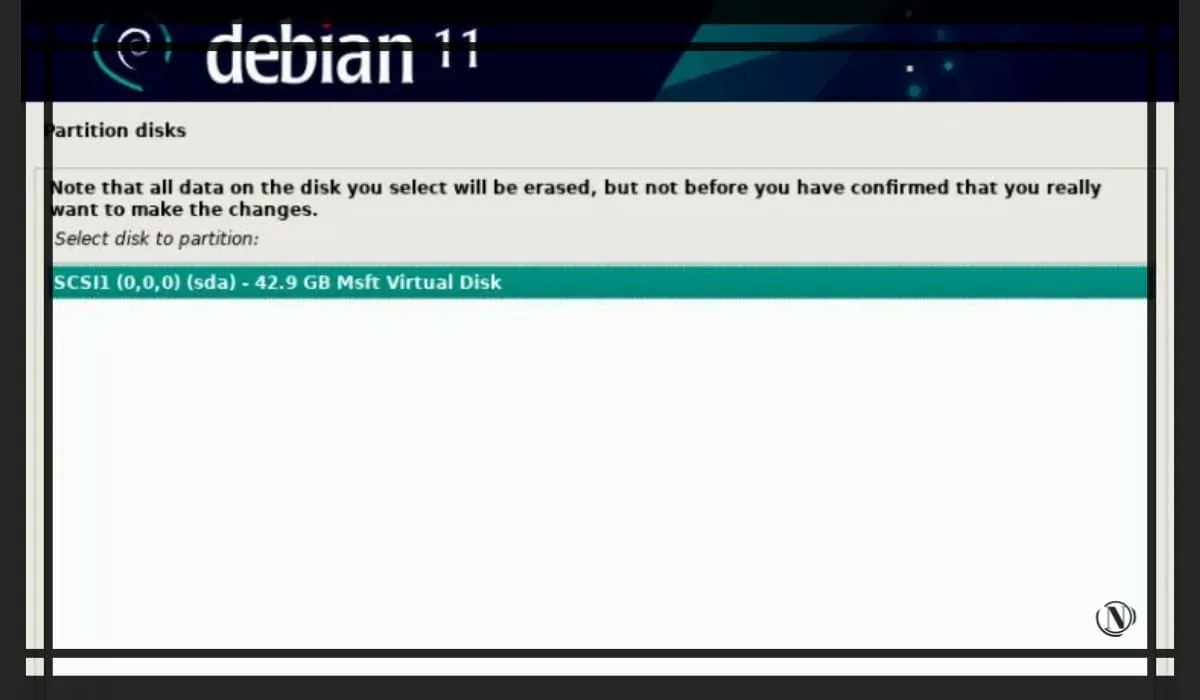
Next, after choosing a disk partitioning method, click "Continue".
In the next window, select the disk on which the partitioning will be installed.
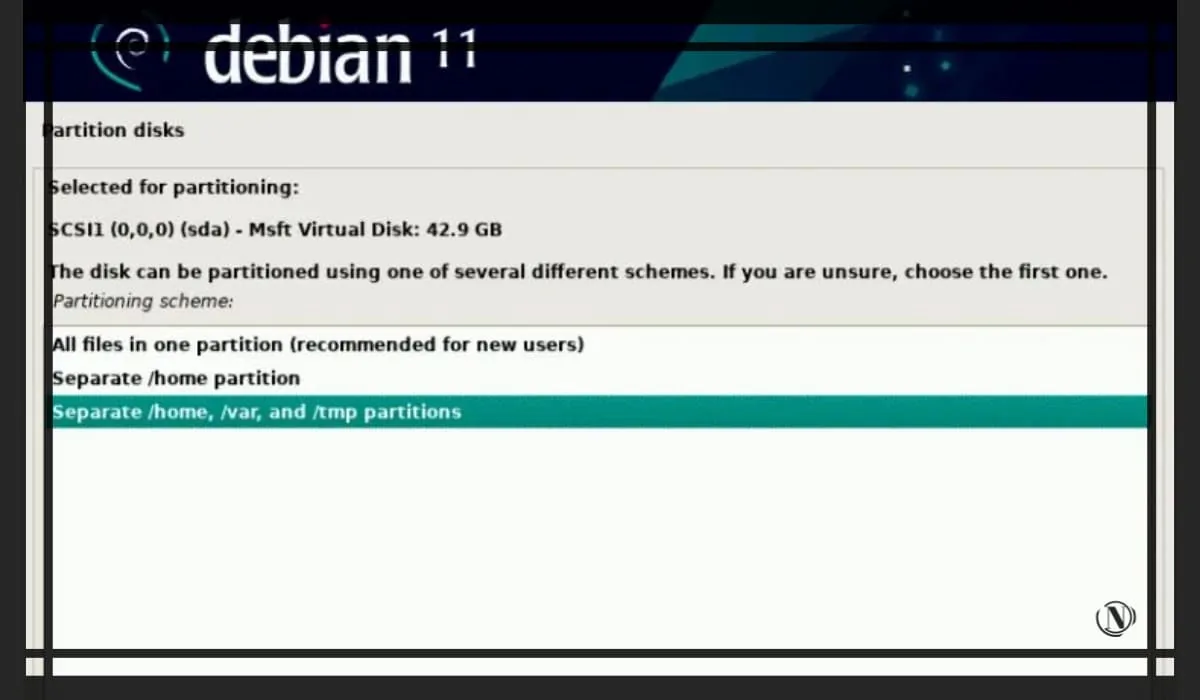
Next, we select a disk layout scheme, in previous manuals, I described several schemes for partition table layout on a disk. For this guide, we'll choose the last markup option, "Split partitions /home, /var, and /tmp". Once selected, click on the Continue button.
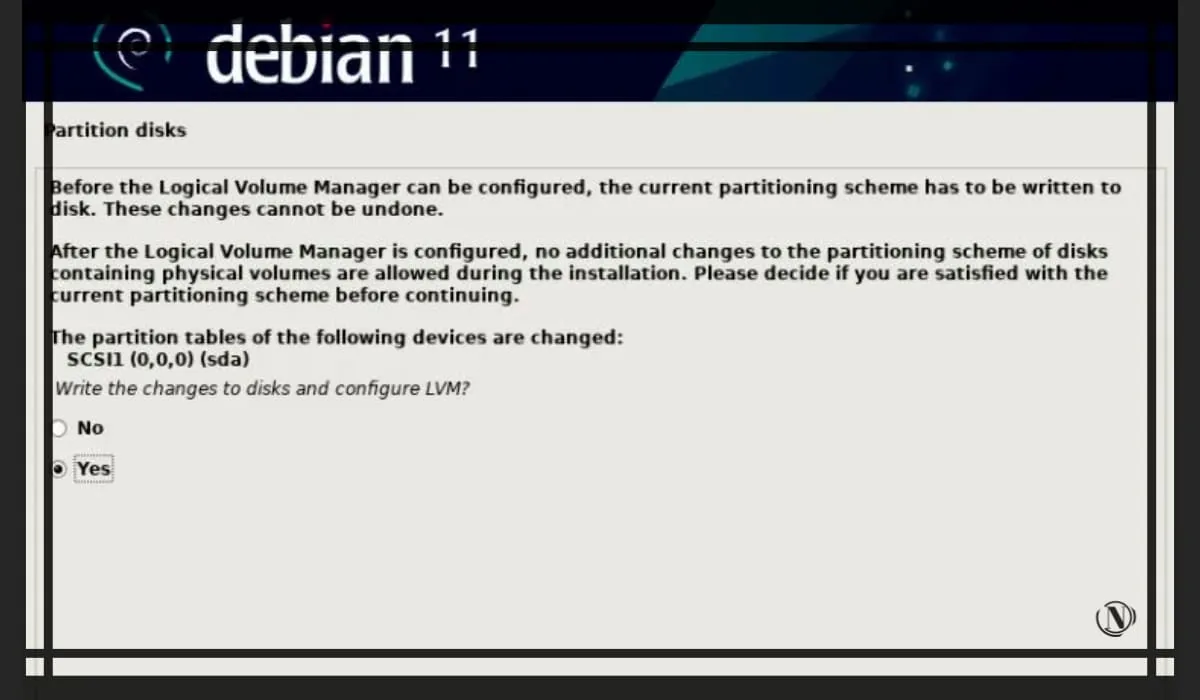
At this stage, choose "Yes", so we agree to make changes to the disk. Once selected, click Continue.
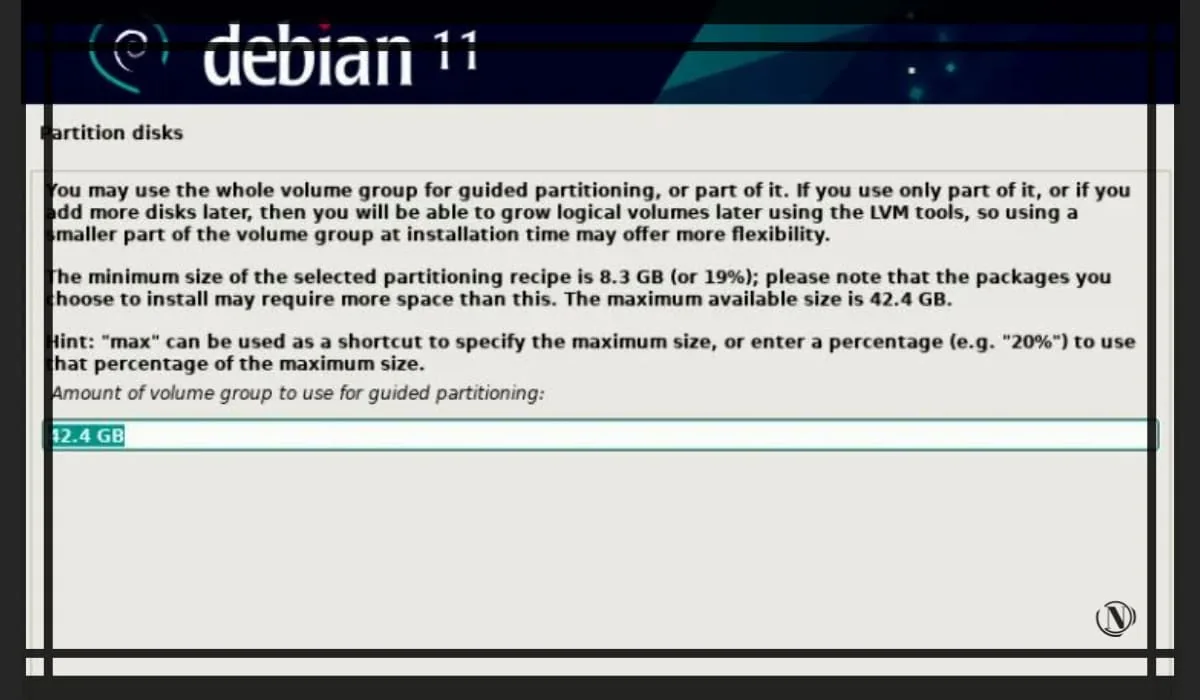
Next comes the screen for selecting used disk space for partitions. Here our task is to specify all the space on the disk by default. According to our partition table layout, which we chose to step back. In this case, the installer will distribute the entire amount of disk space under "partitions /home, /var and /tmp". After completing this action, click Continue.
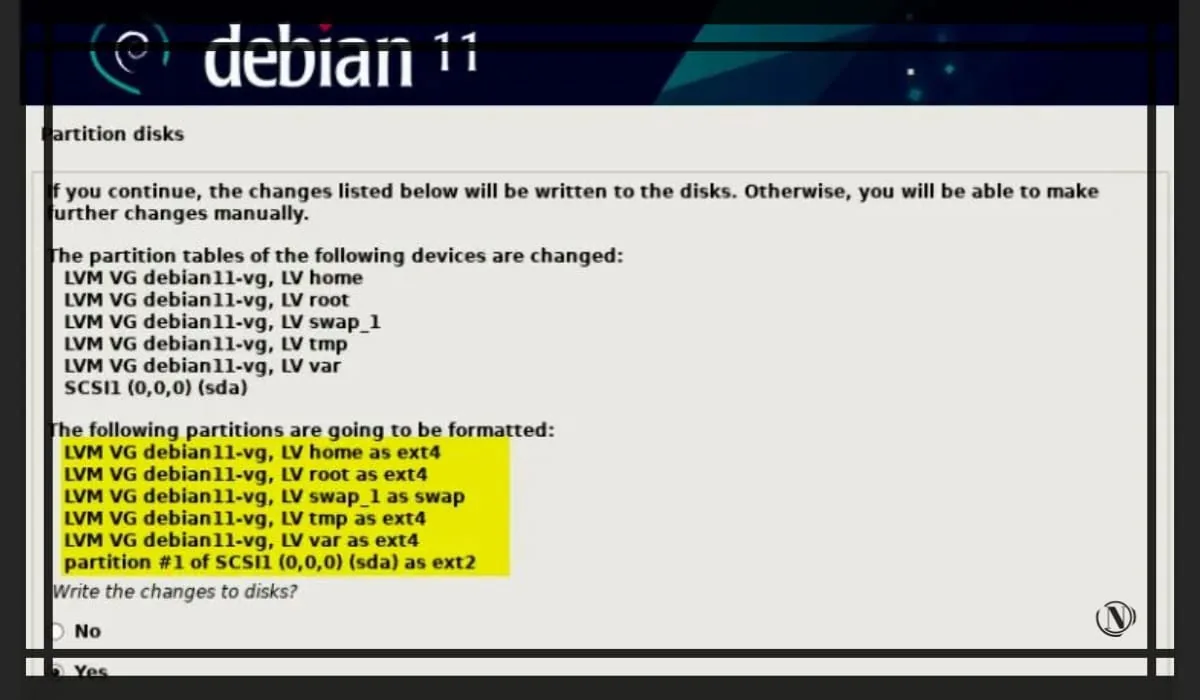
In the window below, the final scheme of the partition table is presented. We check it and select "Yes" to write the changes to disk and to "Continue".
Now the partitioning of the disk is finished, the installer will format the disk and write our partitions to it. Next, the components will be loaded.
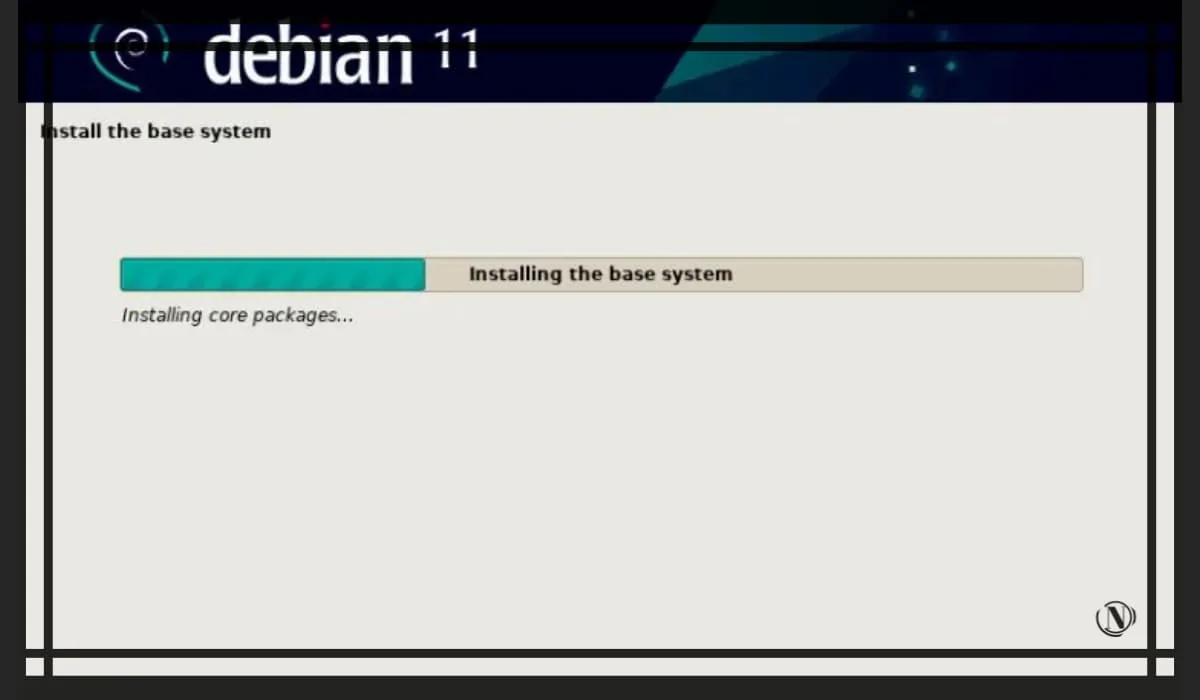
Installing a Debian base system
At this stage, the installer downloads the necessary components of the Debian 11 base system. The installation process will take some time, you need to wait.
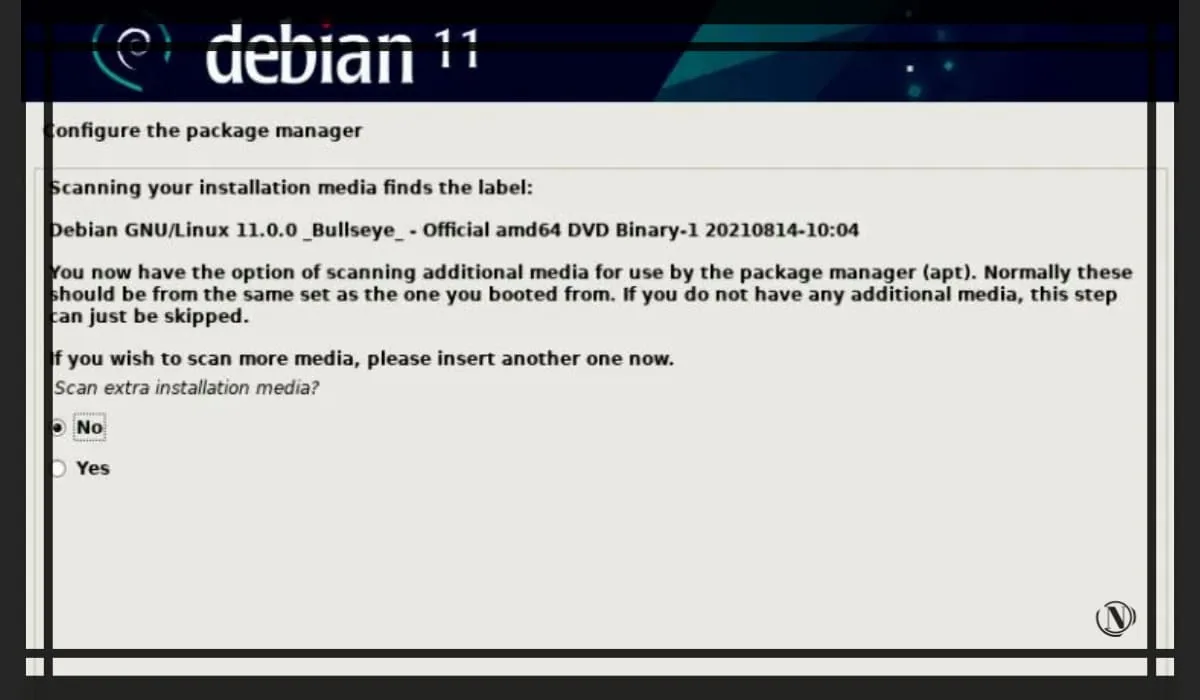
Next, you will be prompted to scan the installation media, here you need to select "No" and click "Continue" to continue the installation.
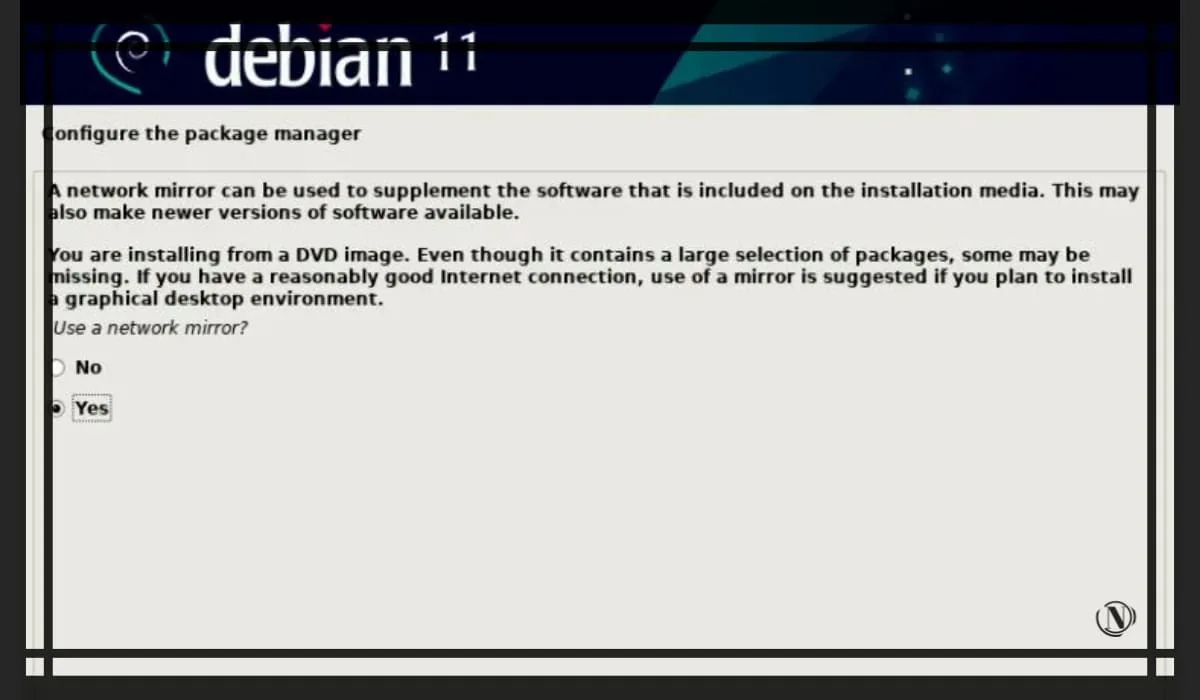
In the next window, select "Yes", this is the process of setting up a network mirror.
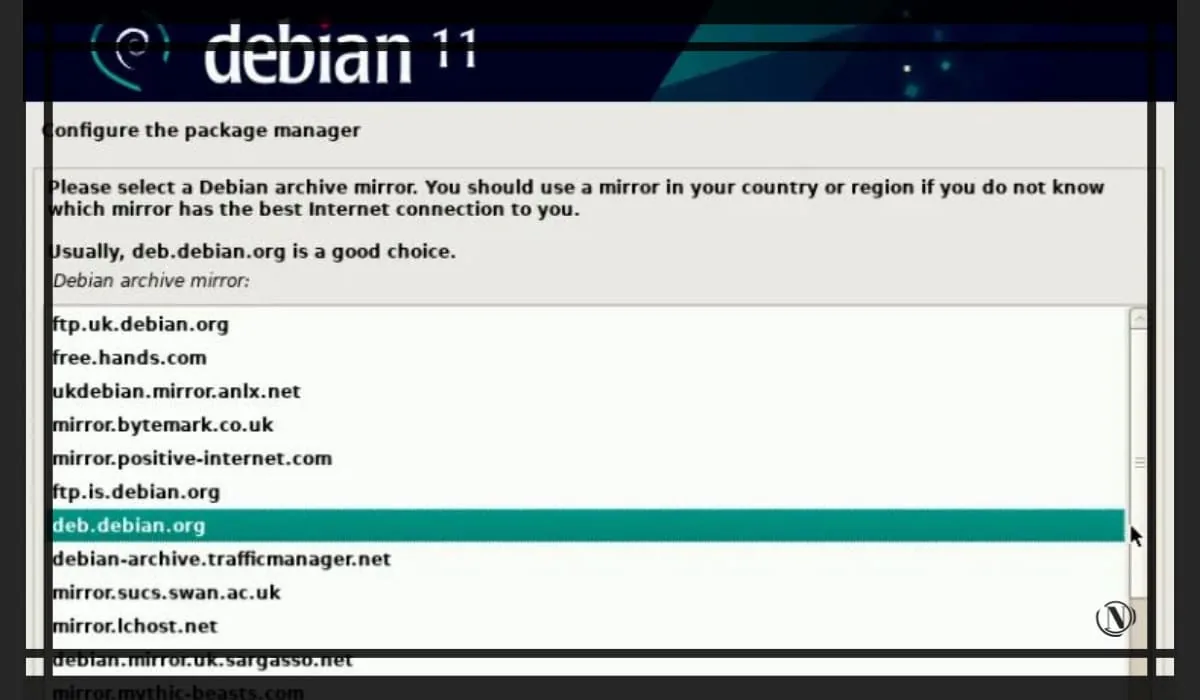
Next, select the region and repository, the place from which the system components and updates will be downloaded. Once selected, click Continue.

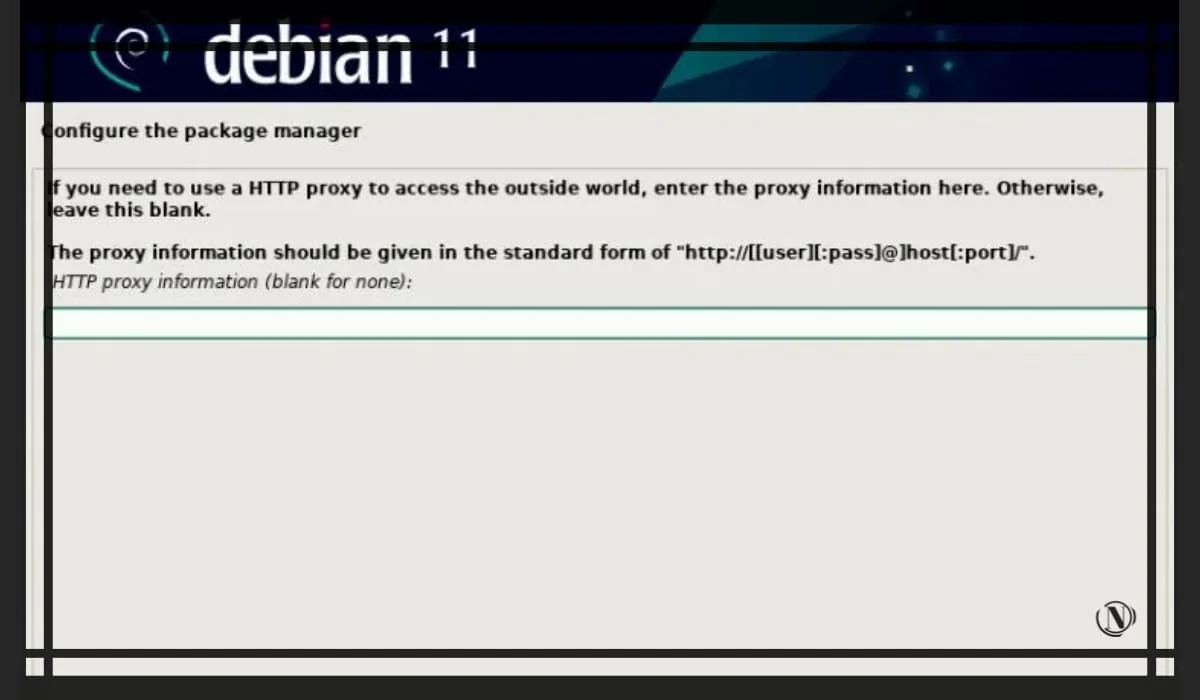
Here, if your system does not use an HTTP proxy server (do not fill in anything and continue). If you are using an HTTP proxy, please provide details and continue.
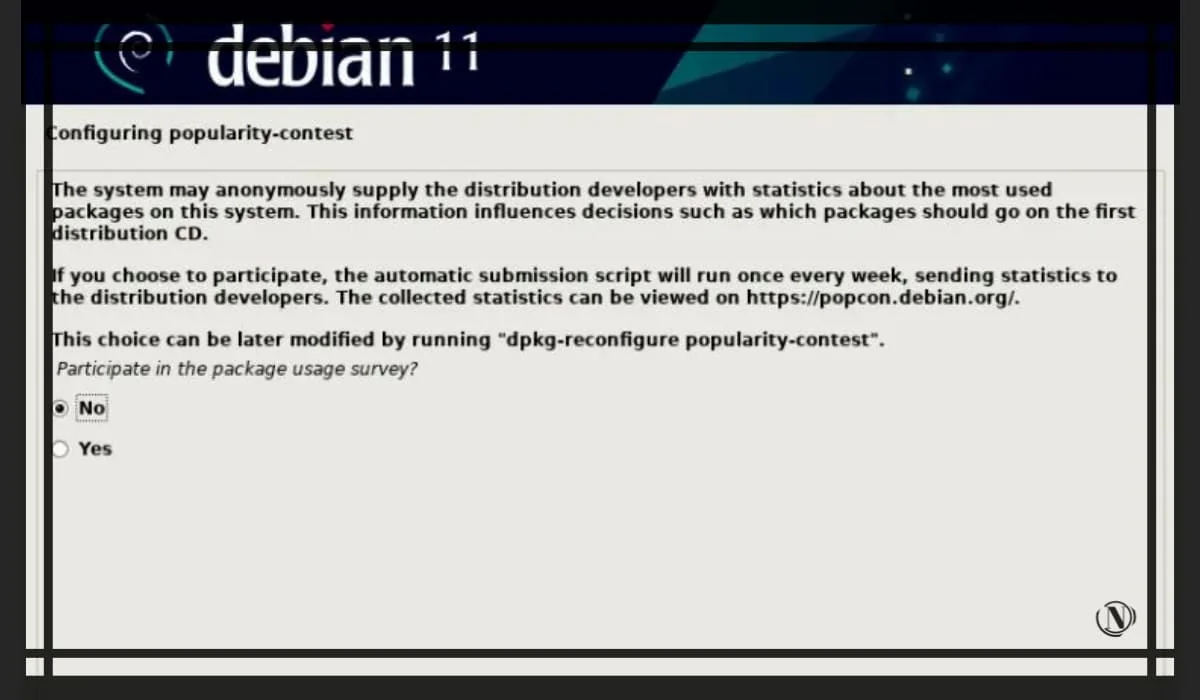
On the next screen, you will be asked to participate in an anonymous survey of packages from the developers of the Debian distribution, select "No" and click "Continue".
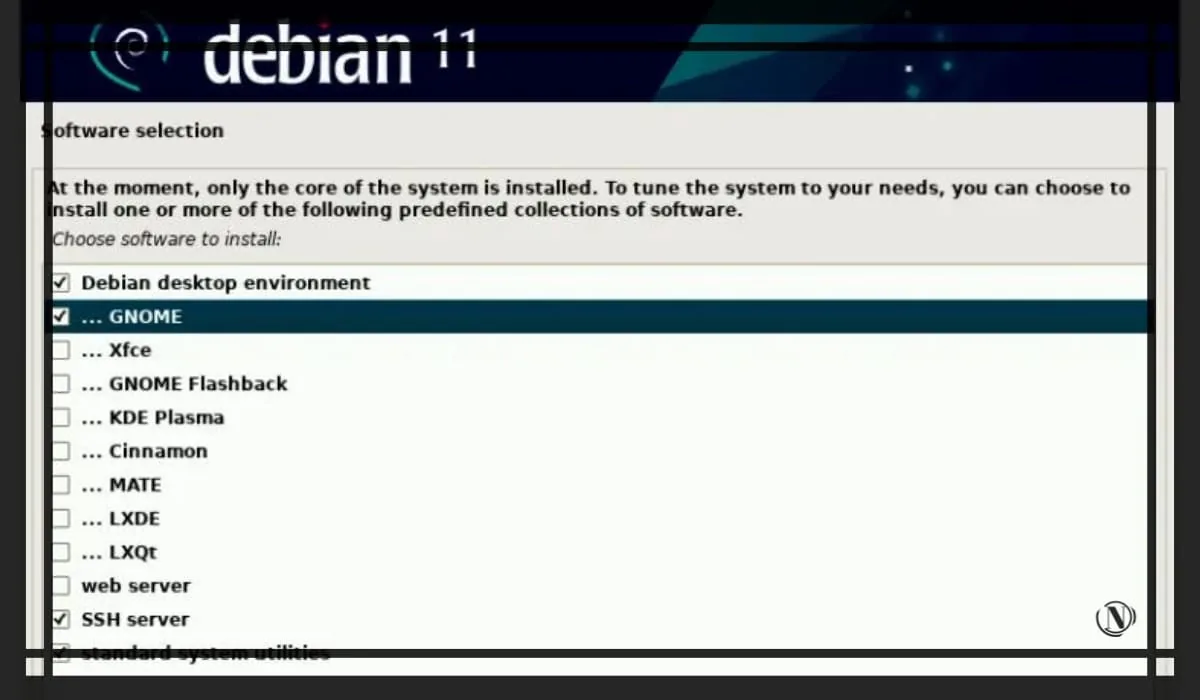
At this point, select the software that you want to install, such as the graphical desktop environment, servers, etc. So, make the necessary selection that suits your installation and click Continue.
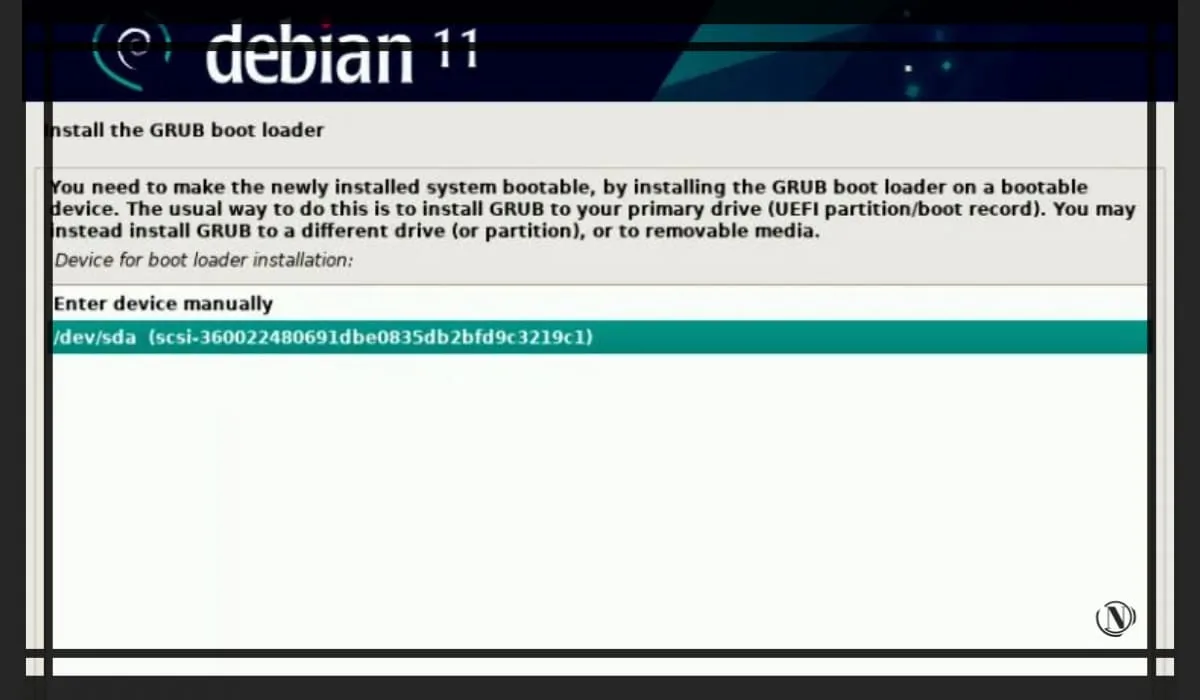
Installing the GRUB bootloader
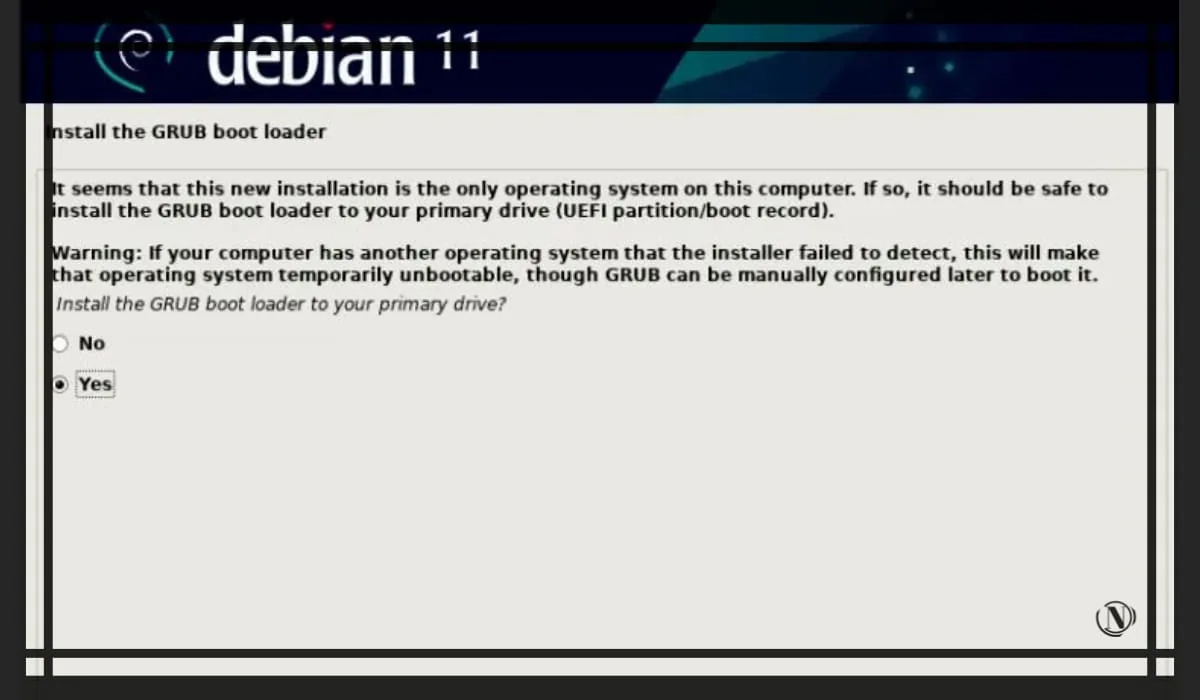
On the next window, select Yes to install the Grub bootloader on your primary hard drive. It is necessary for the correct loading of your operating system. Click Continue.
At this step, you need to select your hard drive on which the Grub bootloader will be installed, then click "Continue".
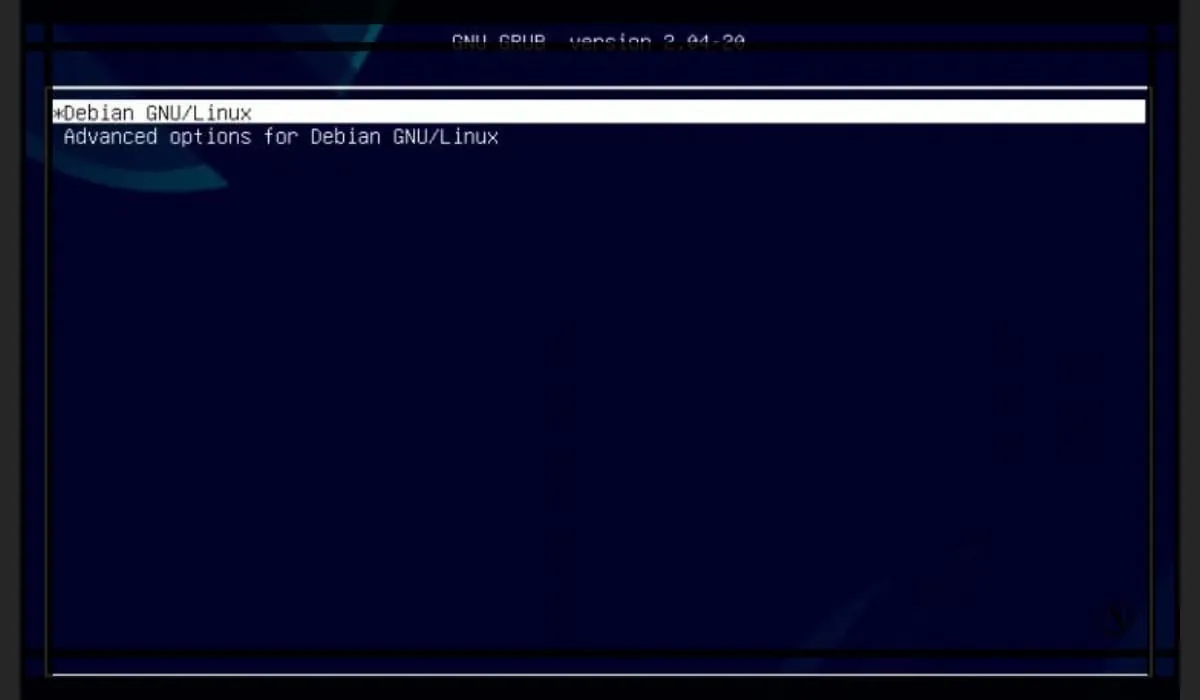
Debian 11 installation finished, this window notifies you that the installation is complete. You just have to continue. This will reboot your system.

After successfully rebooting the Debian 11 system, you will see the Grub boot screen, after a few seconds the system will boot.
Conclusion
We installed Debian 11 together, I have more detailed tutorials on my website in the Debian section, as well as examples of creating a home server. Also, please note that the new release of this OS is already being tested and will be available soon. Codename of the new distribution bookworm
. Follow the news and updates on the site. Well, I wish you guys good luck.
Reading this article:
Thanks for reading: SEO HELPER | NICOLA.TOP


Got it, thanks. Now I will try to install it on my computer. I'm waiting for your settings))) And I don't see anything in wordpress. When will you start?
Victoria, good afternoon. Thanks for the feedback. A little patience, I'm in the process)
Excellent guide, listened to from Alice. It went)) Everything was clearly explained. Thank you
Thank you, I installed Deb according to your guide. Thanks a lot. Installed on the first try, didn't even have to reinstall.
I'm glad the guide helped you.