How to Download and Install Debian 10 Buster
![]()
Installing Debian 10 Buster or 11, 9 or 8, not so important. It is important that the creation of a server begins with the installation of the OS. Installing Debian can be carried out on a PC, laptop or full-fledged server equipment. It is important to understand that Linux systems are designed to administer servers. Therefore, installing a Debian distribution is a top priority. In previous tutorials, I talked about installing debian 8.5 jessie and debian 9.1 stretch, the installation steps have not changed. We still need to perform all the same steps.
Debian is still a key Linux distribution. The system is old and in demand, it is believed that the Debian distribution is the most secure and secure, unlike other Linux systems. However, developer support for this distribution will end in a couple of years.
Increased stability is the most important factor I like about Debian.
New updated release released March 26, 2022 Debian 10 buster
. The distribution has many system security fixes. More stringent OpenSSL signature verification algorithms.
Fixed a large number of existing bugs in packages and components, here is a small extract: apache-log4j1.2, apache-log4j2, atftp, base-files, beads, btrbk, cargo-mozilla, chrony, cimg, clamav, cups, debian-installer, debian-installer-netboot-images, detox, evolution-data -server, inux-signed-amd64, linux-signed-arm64, linux-signed-i386, llvm-toolchain-11, etc.
Updated system security packages, here are some of them: samba, apache2, neutron, wordpress, tomcat9, squashfs-tools, php7.3, bind9, postgresql-11, libxml-security-java, apache-log4j2, xorg-server, spip, djvulibre, debian-edu-config, h2database , linux-signed-amd64, linux-signed-arm64, linux-signed-i386, tryton-server, etc.
Removed useless packages: angular-maven-plugin and minify-maven-plugin.
In this guide I will show you how to install Debian 10 buster
on a computer, laptop or server equipment. For subsequent configuration and installation of software for the server.
The content of the article:
- Preparing to Install Debian 10 OS
- Burning an ISO image to media
- Installing Debian 10 from a flash drive
- System language priority
- Location parameter
- Keyboard layout and language switching key combination
- Configuring network settings
- Setting up the superuser root
- Setting up a standard user account
- Disk partitioning
- Completing disk partitioning
- Base system installation
- Installing the GRUB bootloader
- Conclusion
Preparing to Install Debian 10 OS
At this point, we need to visit the official debian.org website as usual. Here we select the release we are interested in and the architecture of the image to download. You can download the available distribution image in the following ways: CD or DVD, ISO image, network download and Life install.
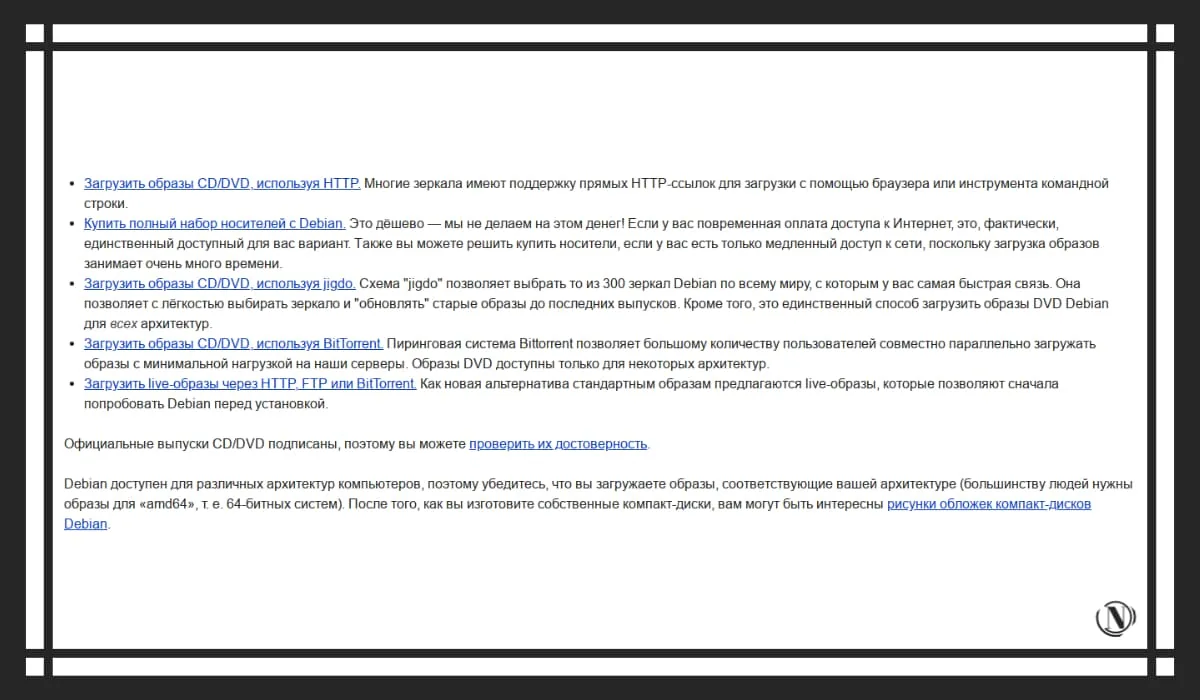
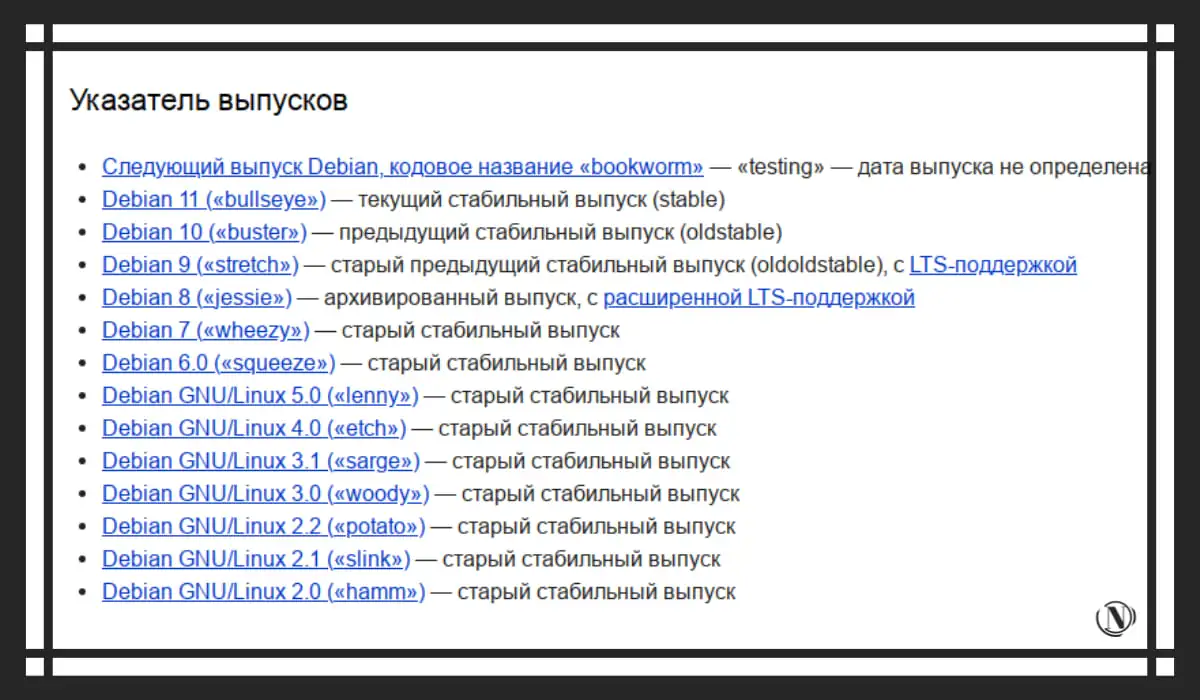
The updated distribution is no longer available for download from the main page of the official site. Today it can be found in the releases section (other releases), select the stable version of the distribution kit you need from the ones offered, here are the first three:
- Debian 11 (bullseye) - (stable);
- Debian 10 (buster) - (oldstable);
- Debian 9 (stretch) - (oldoldstable), with LTS support.
See image below:
If you need more information, there is a detailed guide on the site. It describes the terminology and options for the entire system installation process. The problem is that it will take you quite a lot of time to study all the content.
So, everyone studied and looked. Choose the image you like and download it. Now we need to write the image to the media.
Burning Debian 10 Iso Image buster
to media
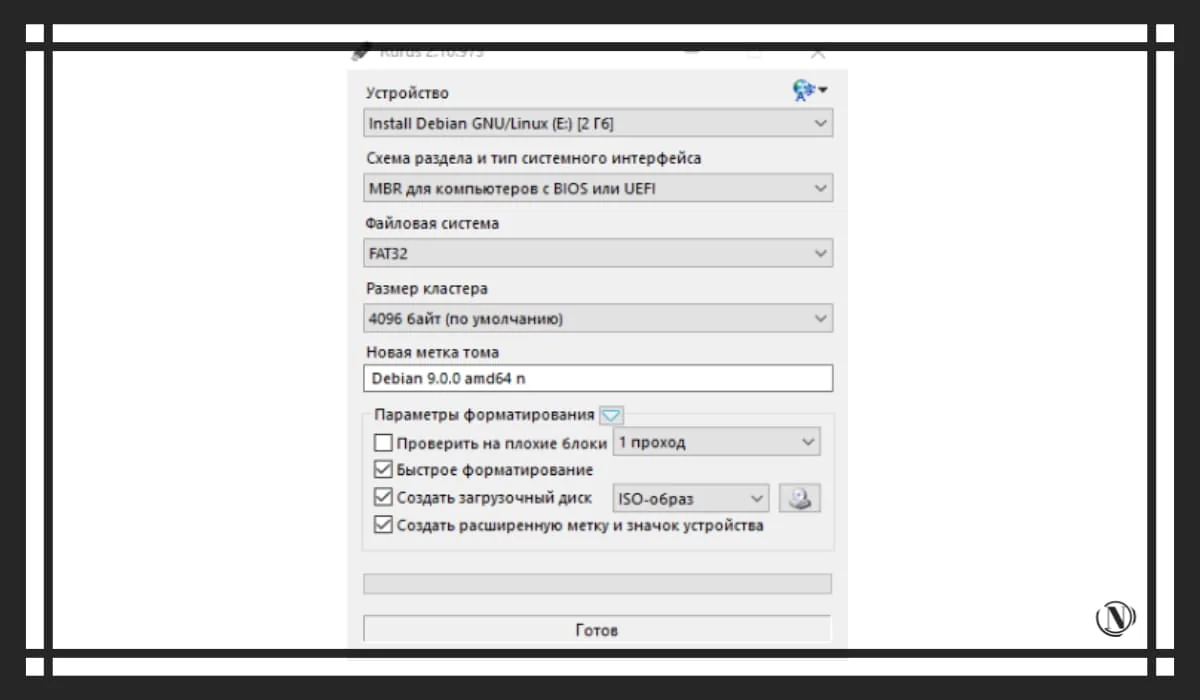
Today, the most popular way to write an image to media is a flash drive. You can use any program convenient for you to burn an ISO image. There are available program options for burning an ISO image to a USB flash drive:
- Unetbootin.
- Etcher.
- Rufus.
- Win32DiskImager.
This is a list of popular free programs on the Internet for Windows. They are all easy to use and have the tools we need to write a Debian 10 distribution image to a flash drive. I prefer, as always, to use Rufus to create a bootable USB with a mounted Debian image to install. See image below:
Once you've successfully mounted the Debian 10 ISO image onto a flash drive. You have to make some changes in the BIOS, I think you can do it without me. Your task is simply to switch the download to boot from a USB flash drive "floppy draw". Next, we move on to the next step of installing Debian 10 from a flash drive.
Installing Debian 10 from a flash drive
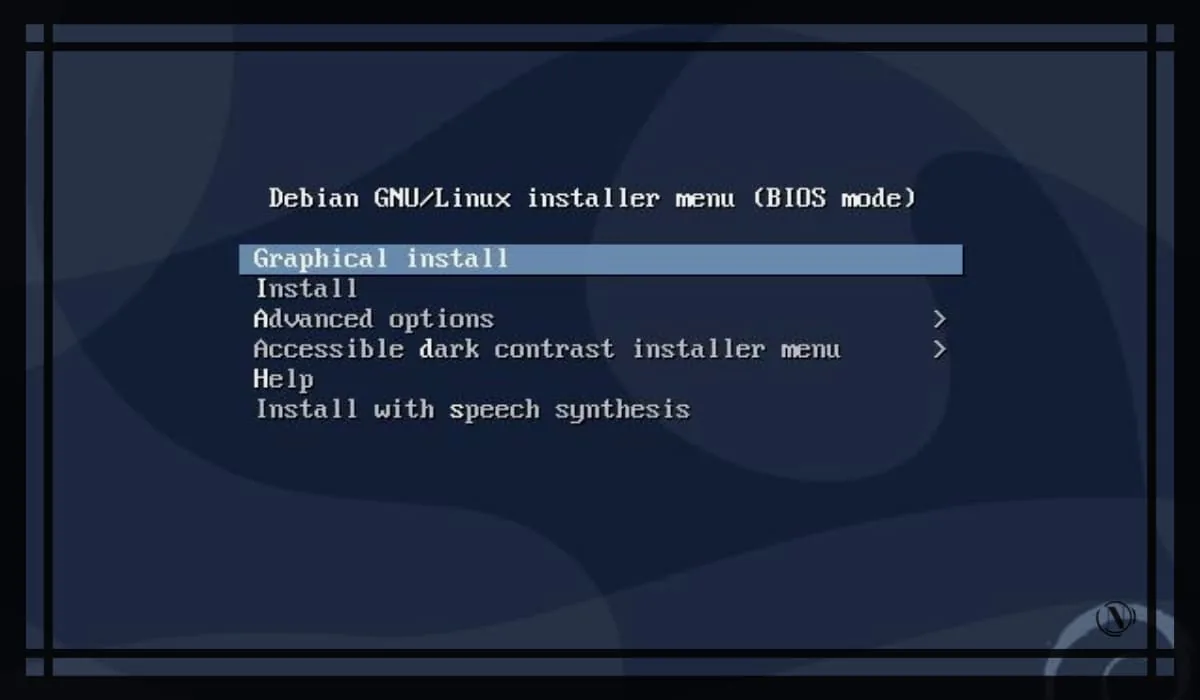
After downloading the installation image of the system, you will see the installation interface selection window. Here you can select the interface for the subsequent Debian installation process. Two options are offered console (Install), and (Graphical Install) installer. As always, I find it convenient to install in a graphical interface. Therefore, we select the installation method: Graphical Install and press enter
After that, the first settings will follow:
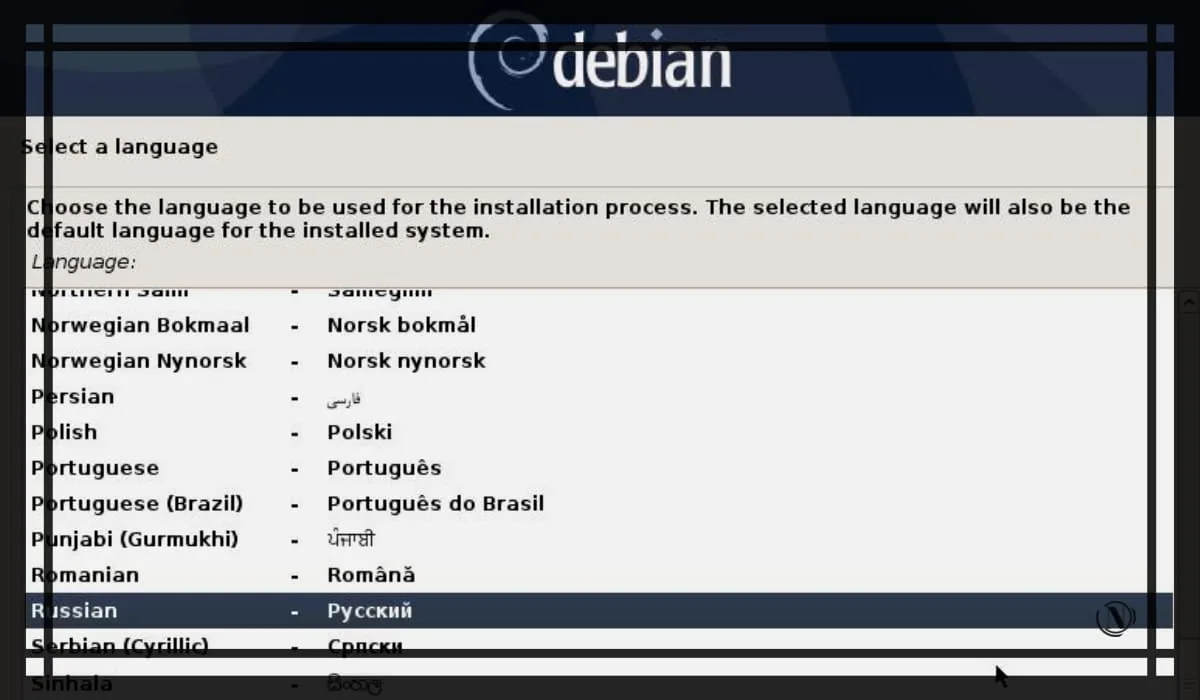
Debian 10 System Preference Language
At this stage of the installation, you need to select the desired language in which the installation process will be carried out. For some, as it is convenient, some prefer English, some prefer Russian. I choose my native Russian, after choosing the preferred language, click on "Continue". See image below:
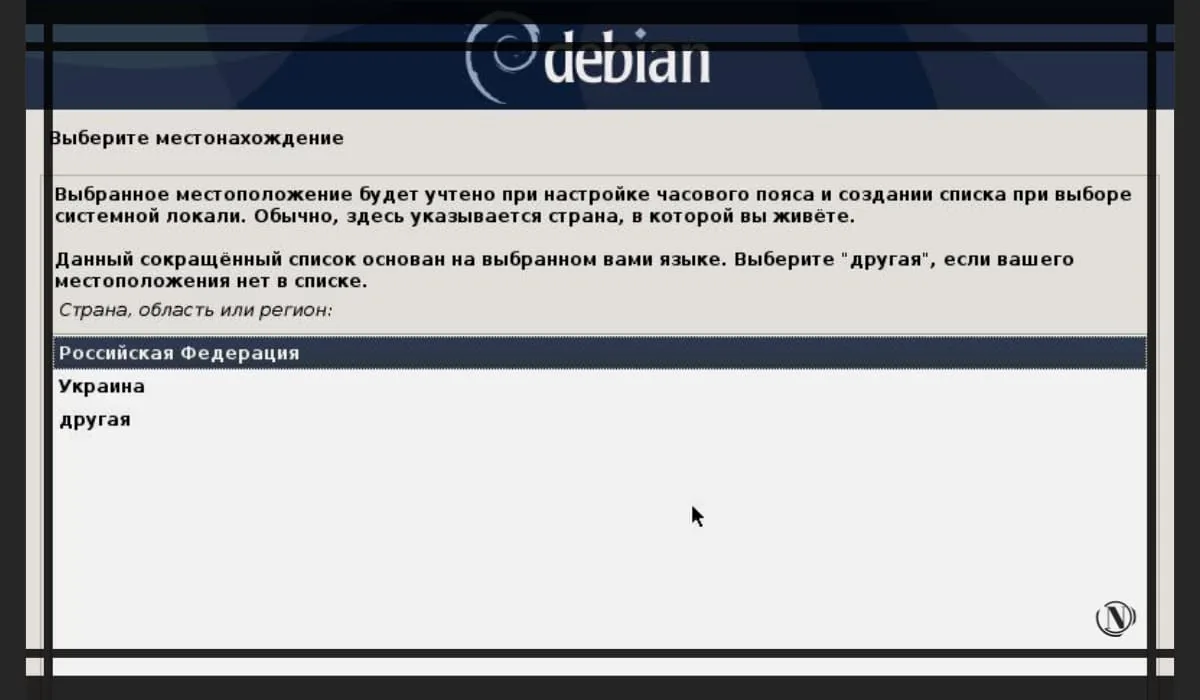
Location parameter
At this stage, you need to select the installation location. This step is important to set the time zone on your server. For the subsequent correct operation of the Debian OS. In our case, select "Russian Federation" and click on "Continue". See image below:
Keyboard layout and language switching key combination
At this stage, select the desired keyboard layout language. Therefore, the priority language for us is "Russian". Select the one you want and click on "Continue". See images below:
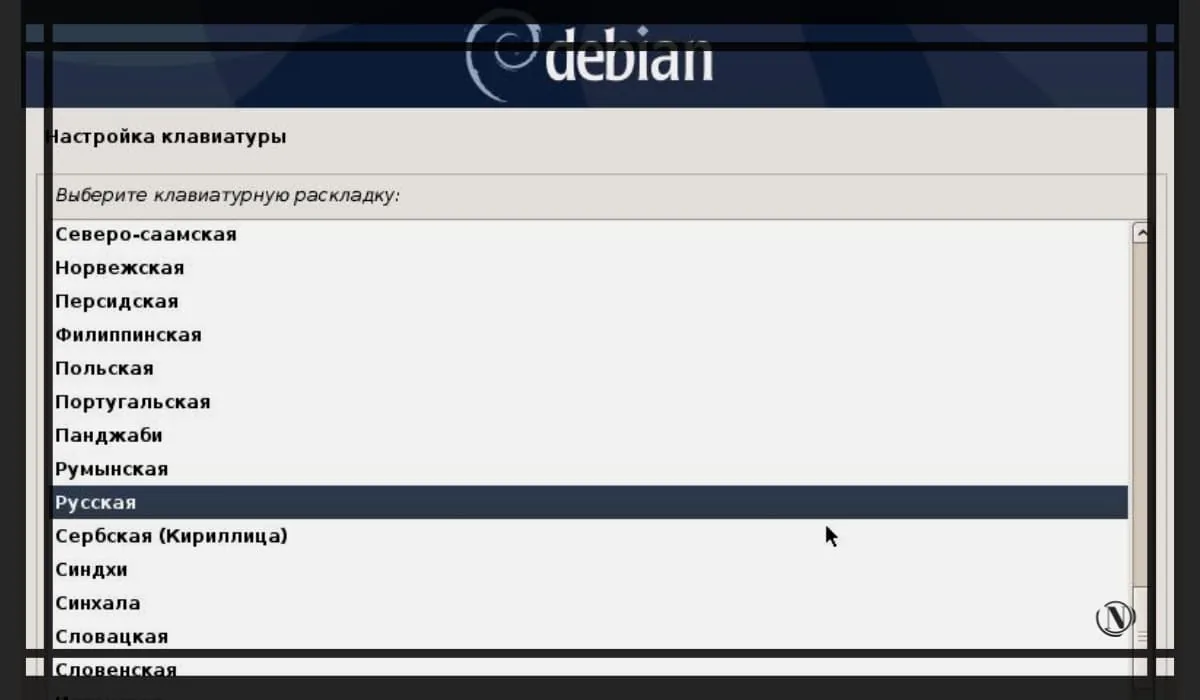
Next is the keyboard shortcut setting, this is necessary to switch the keyboard between languages. The default is "Alt + Shift", leave it as it is and click on the "Continue" button.

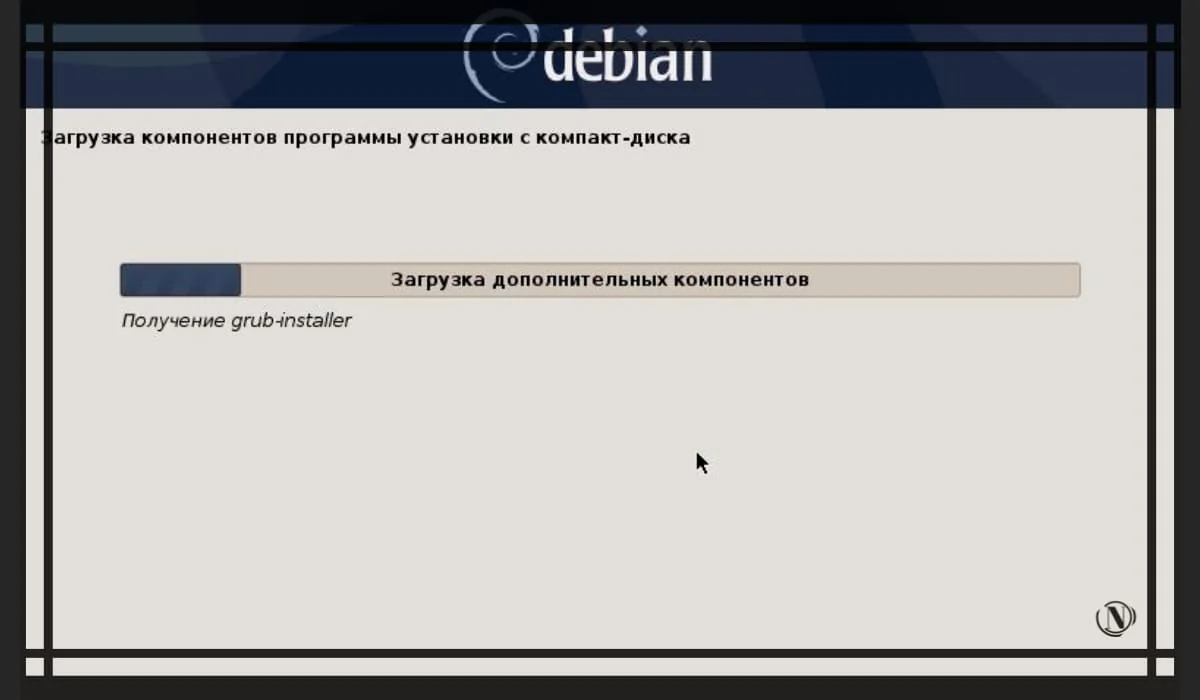
We are waiting for the completion of the process of downloading additional components from the disk (ISO image) for installation.
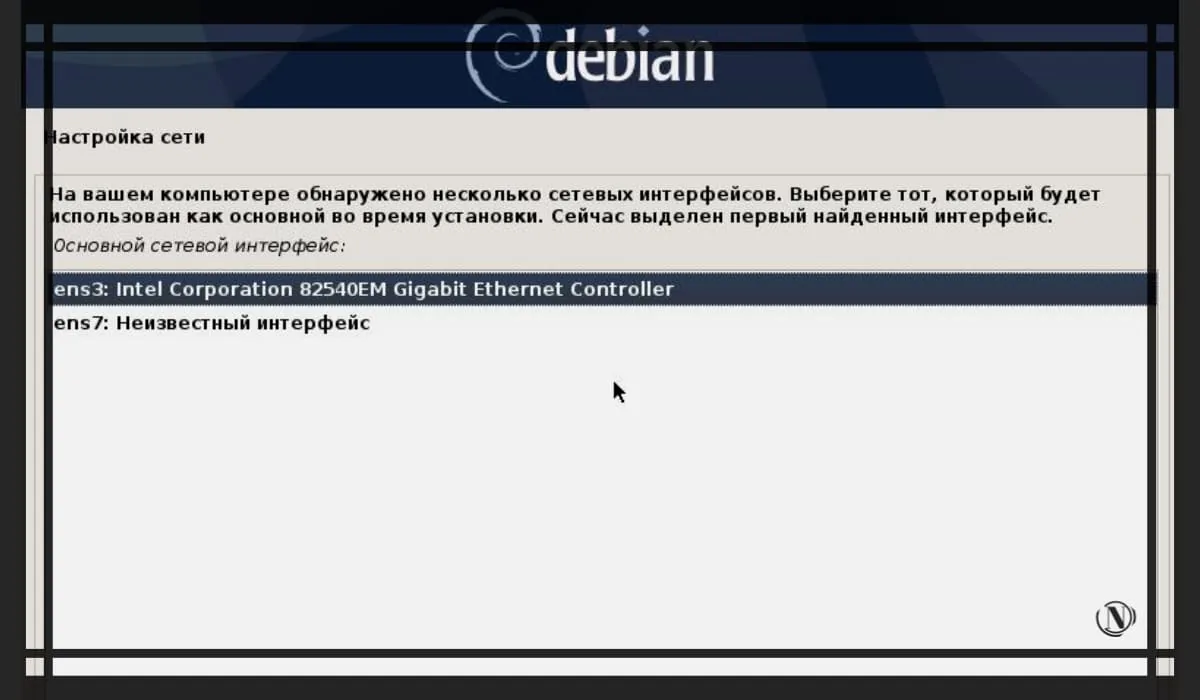
Configuring Debian 10 network settings
After the process of loading the system components from the CD is completed. An attempt should be made to automatically configure IPv6. In the window that appears, select a recognized network interface and click Continue. See image below:
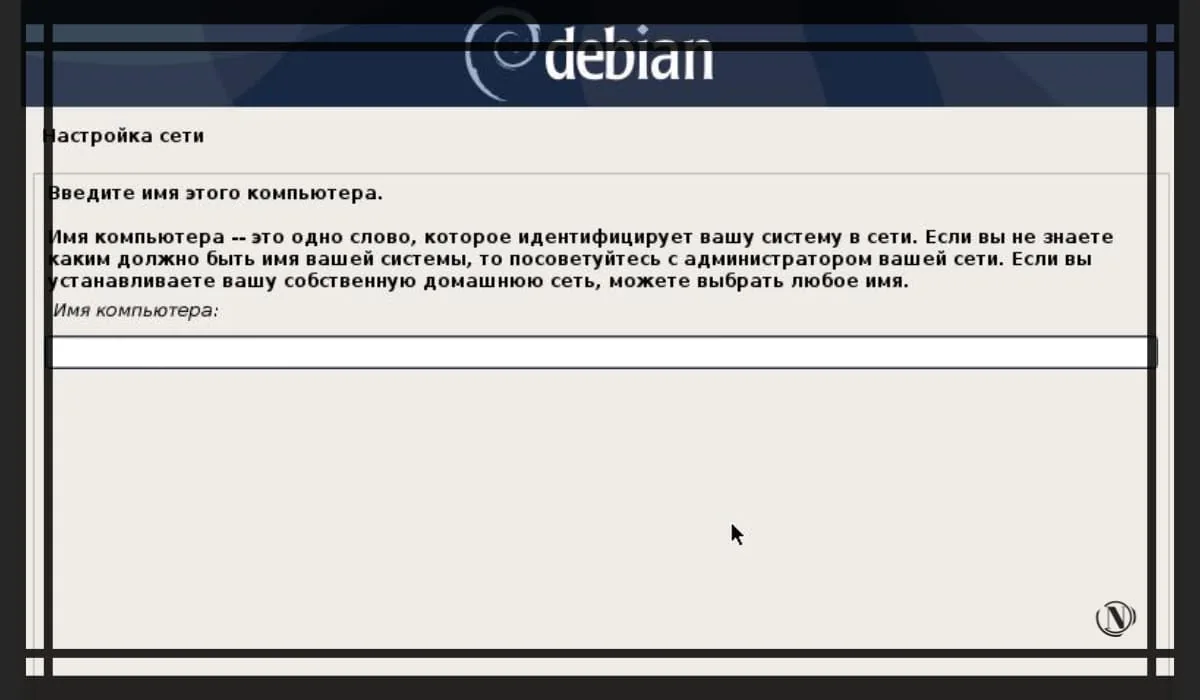
The next step is to enter the server name (here, you must specify the domain name). In case you don't have a domain, leave the auto-generated one and click "Continue". See image below:
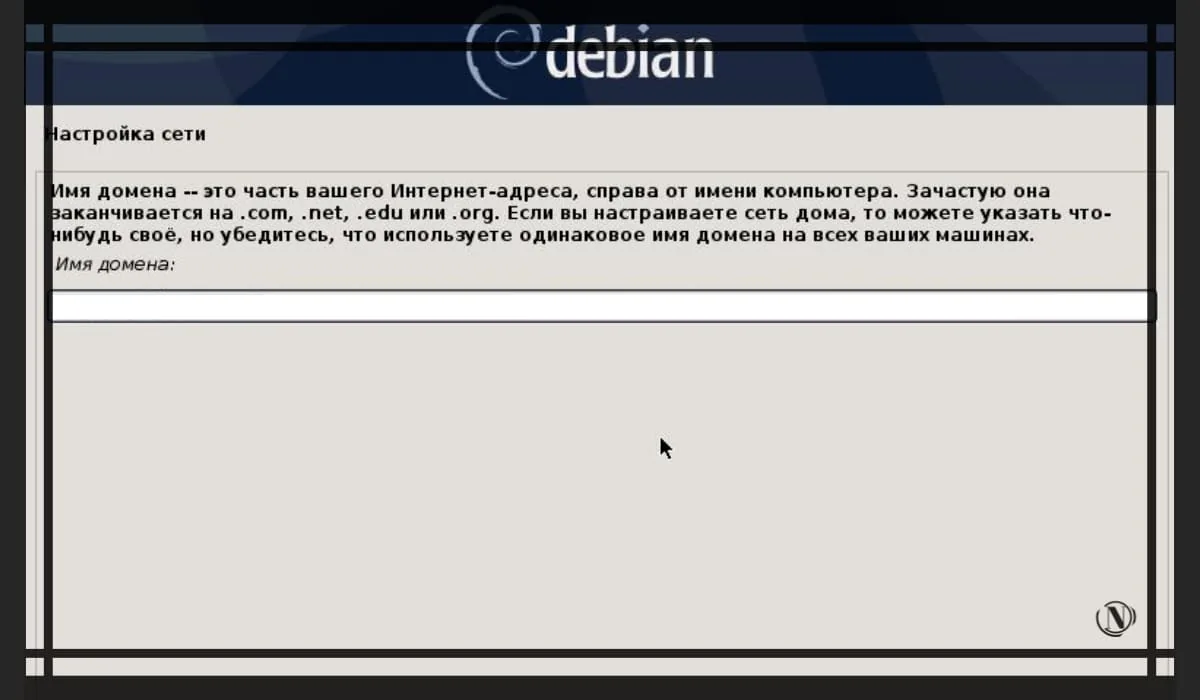
In the next window, enter the domain name if you do not have a network domain (leave this field blank). In some cases, the installation may detect the domain automatically, follow the action and click "Continue"
Configuring the root superuser on Debian
At this point, enter the password of the root (system superuser) user in the "Superuser password" field, then repeat this password in the next "Enter password again" field. Click Continue. See image below:

Setting up a standard user account
This step provides the ability to create an account with simple (limited) rights in the Debian operating system. In the empty field: enter the username (for example, Igor Pavlov). Click Continue. See image below:
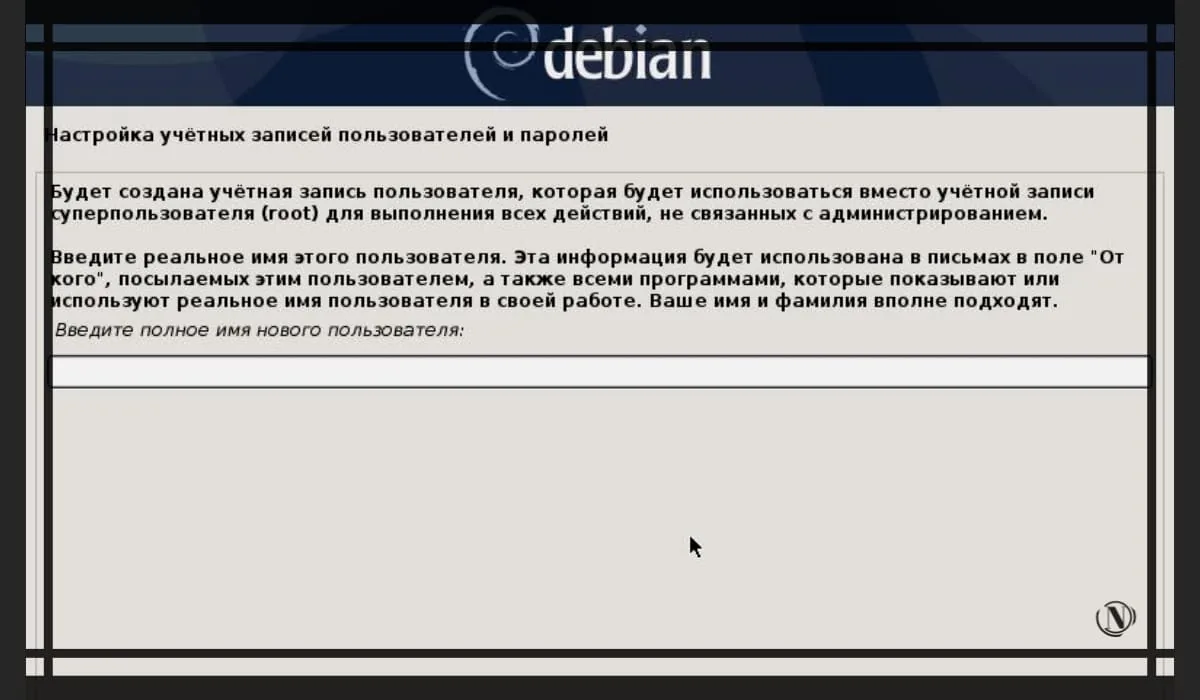
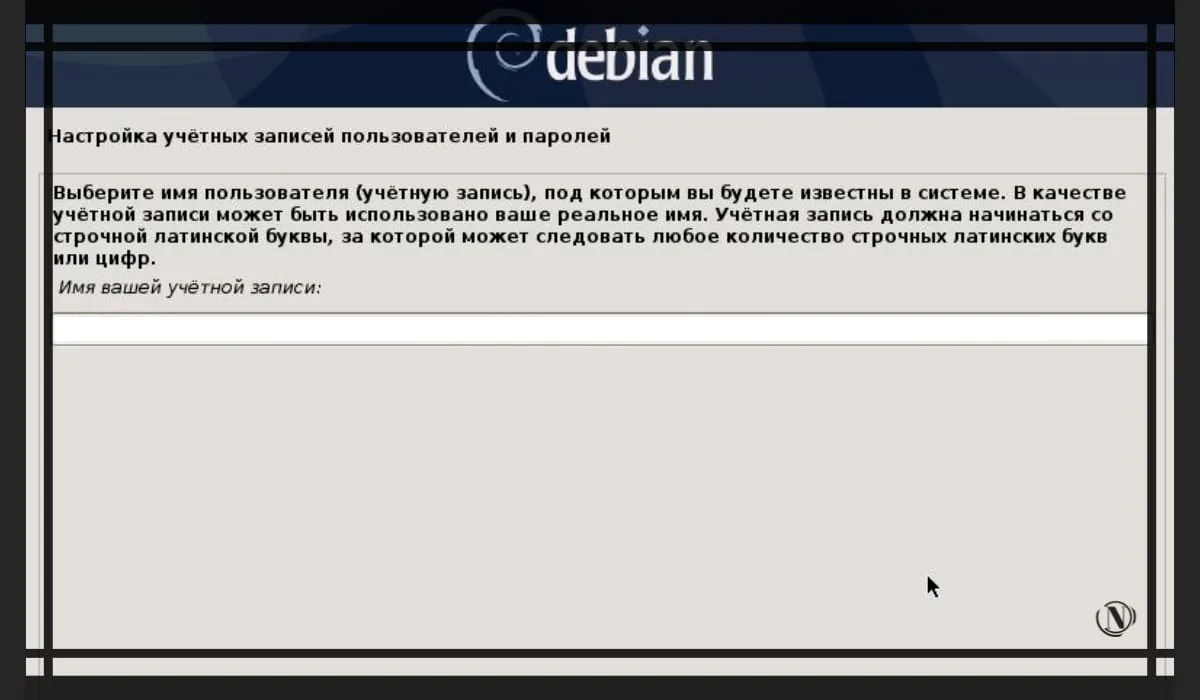
Standard user account. It's better to come up with your own name. The account name is the nick on behalf of which you can log in to the system. The best and safest option would be to create a complex nicknama. After entering, click on "Continue".
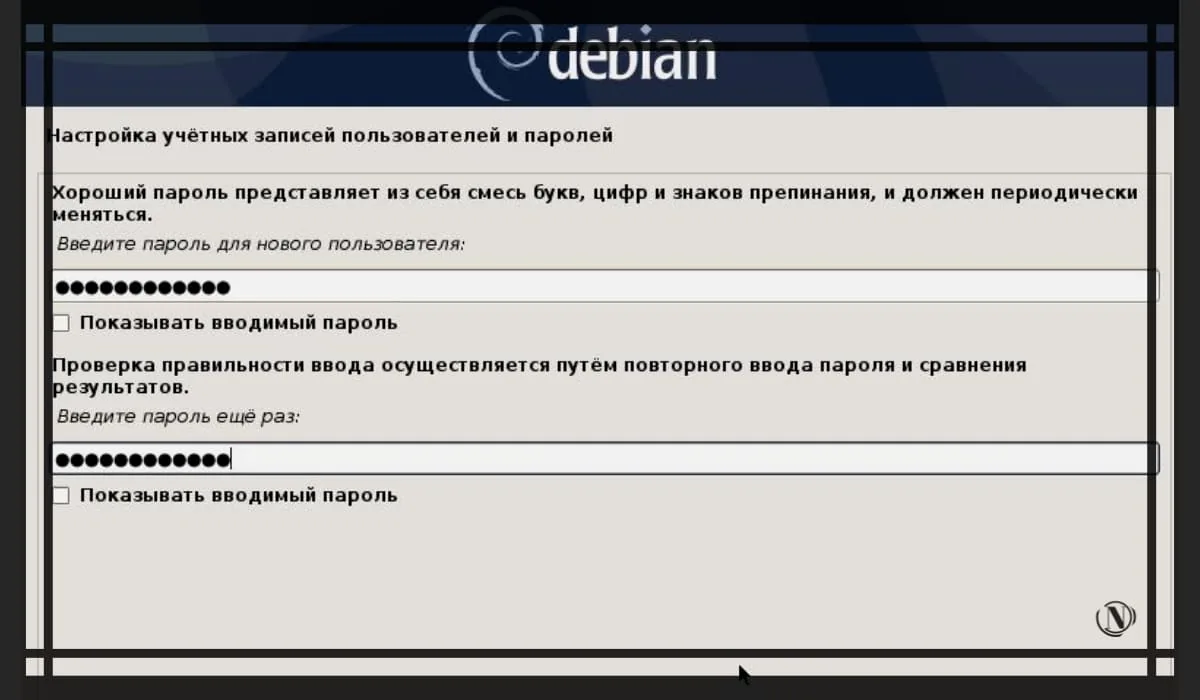
Then enter the new user's password and click Continue.
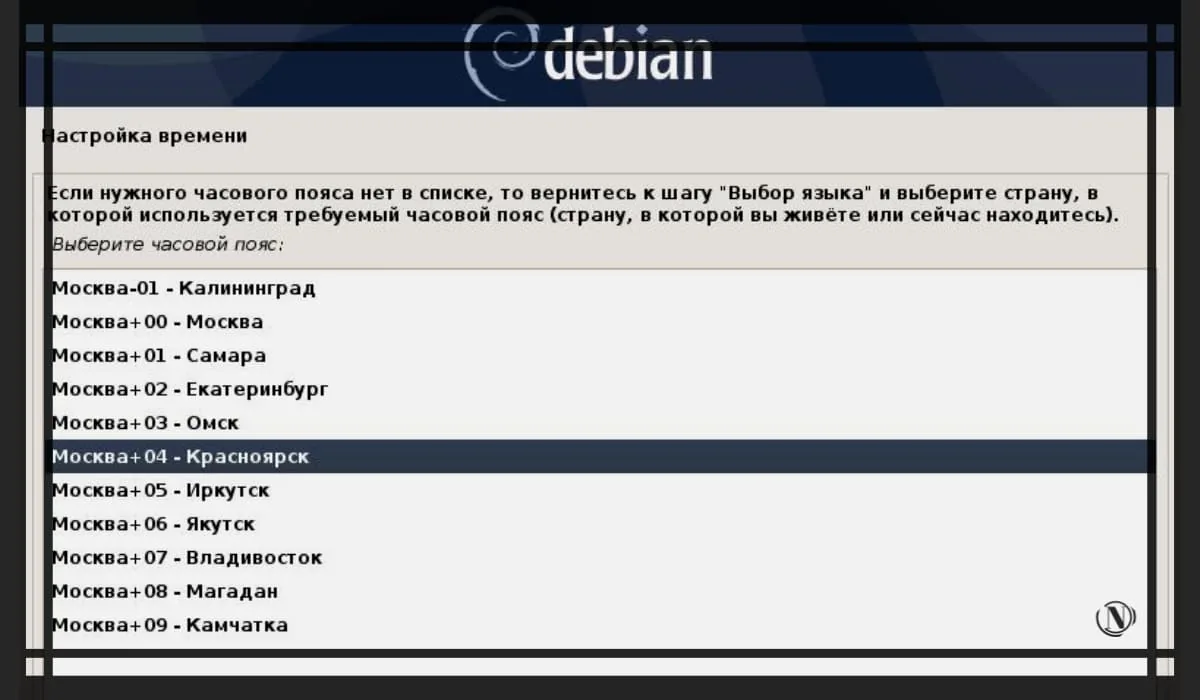
Next, select the appropriate time zone for your region of the country, click "Continue". This step completes the setup of user accounts. We are moving on to the next stage.
Debian 10 Disk Partitioning
At this stage, choose one of the markup options that is convenient for you. I choose automatic partitioning "Auto - use entire disk". Click Continue. (In past articles, I considered other options for disk layout).
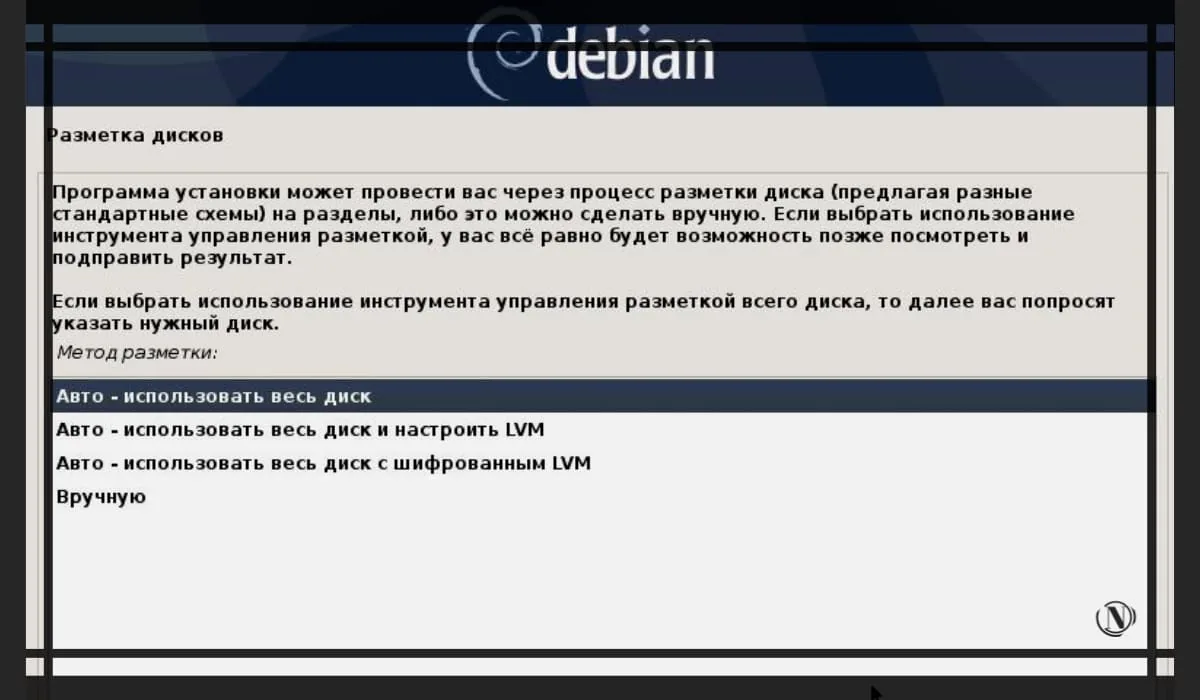
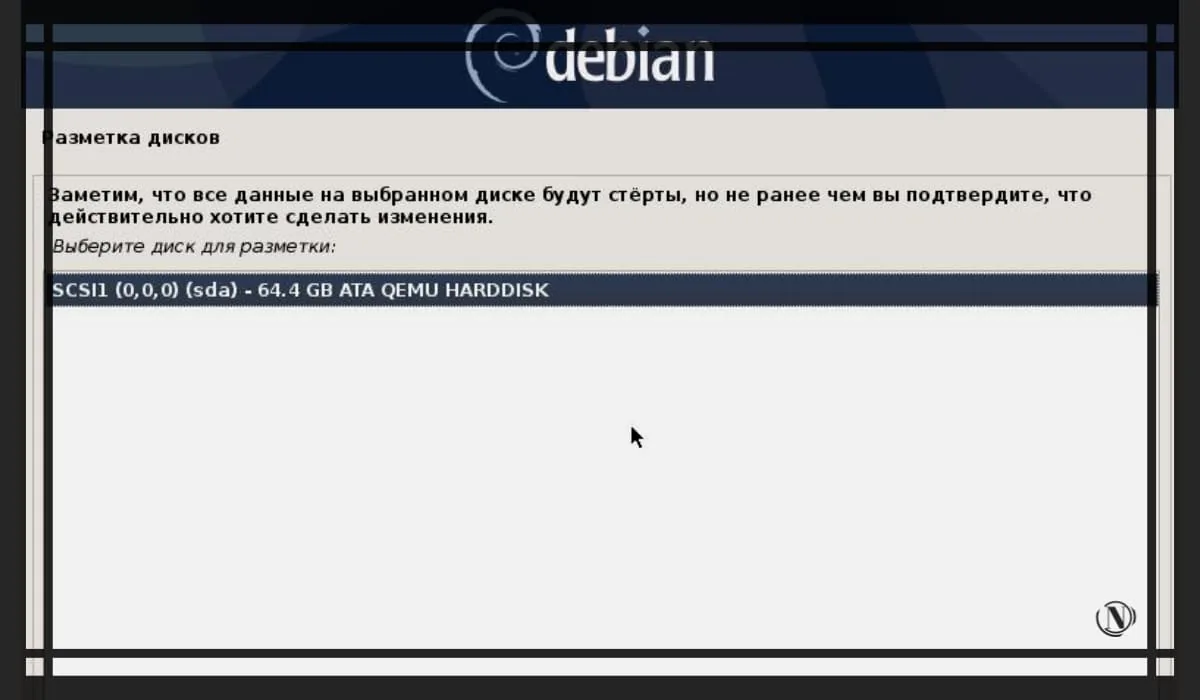
Next, you should select a disk from the options offered, if you have several (connected disks), select the one on which the distribution will be installed. Click on the "Continue" button.
In the next window, leave a check mark on the item "All files in one partition (recommended for beginners)", then all the space will be in the root partition. This markup method is simple and popular among novice admins. See previous articles for other disk partitioning options. Click Continue.

Completing disk partitioning
Next, leave the option "Finish partitioning and write changes to disk" checked. Click Continue. See image below:

At this point, select "Yes" to write the selected layout to disk. Thus, you agree to the formatting of disk partitions and writing to it the selected table of the disk partition layout structure. Click on the "Continue" button.
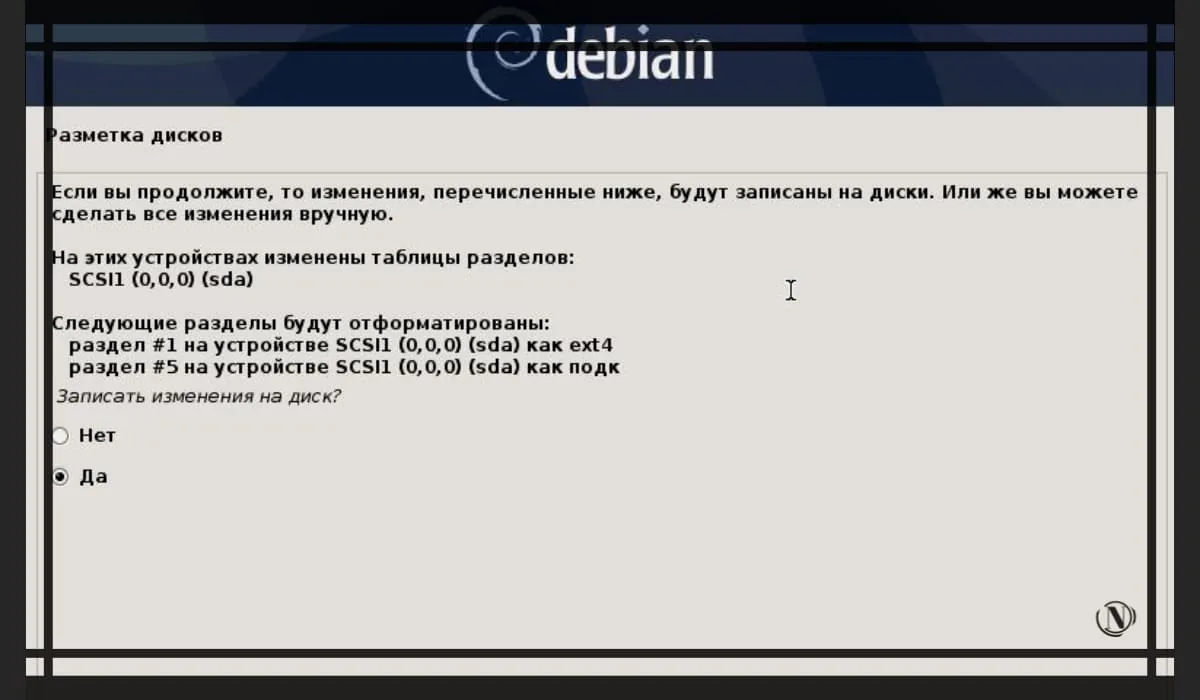
Briefly: so that you have an understanding of the disk layout structure. It is more correct and safer to keep sections separate from each other. For example: system bootloader partition /boot, swap file section, home partition (home), root partition / (the remaining unallocated disk directories (apt, var, bin, usr, opt, etc.) are converted into it. In fact, everything can be partitioned into separate partitions. But, as I know, a popular way to partition a disk is 3-5 partitions .
Installing a Debian base system
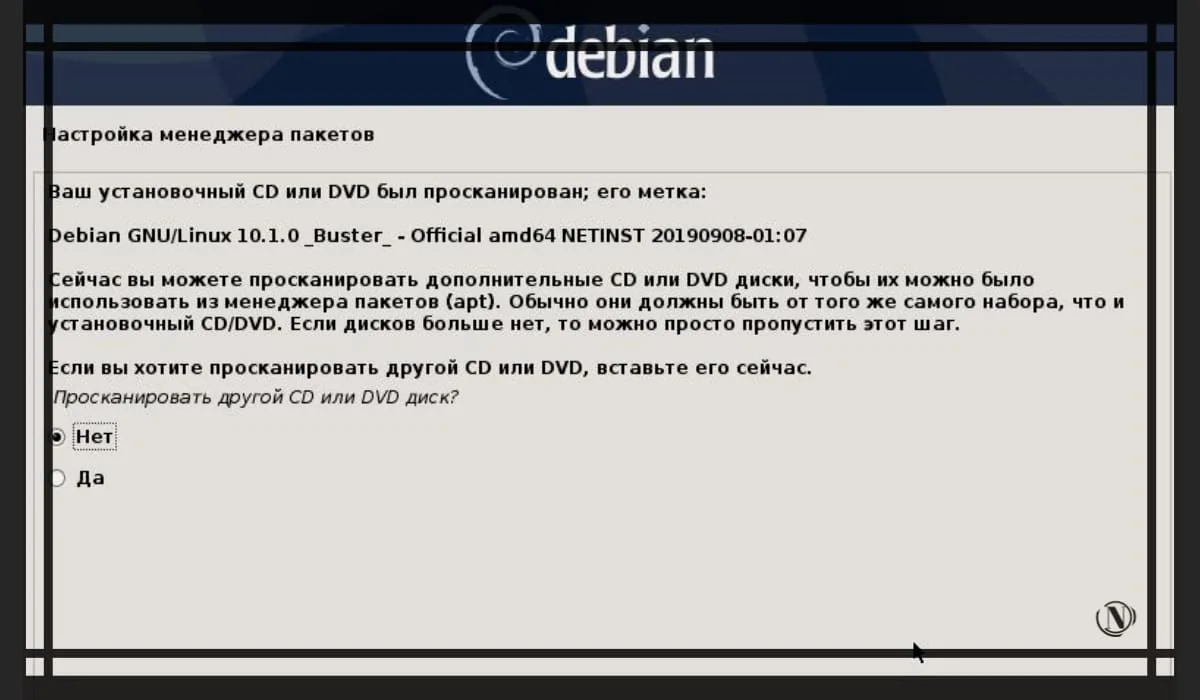
The next step is installing the base system, setting up the package manager, using additional disks (there are no iso images), select "No" and click on "Continue".
Next, you need to select the country in which your server is located, select "Russian Federation" and click on the "Continue" button.
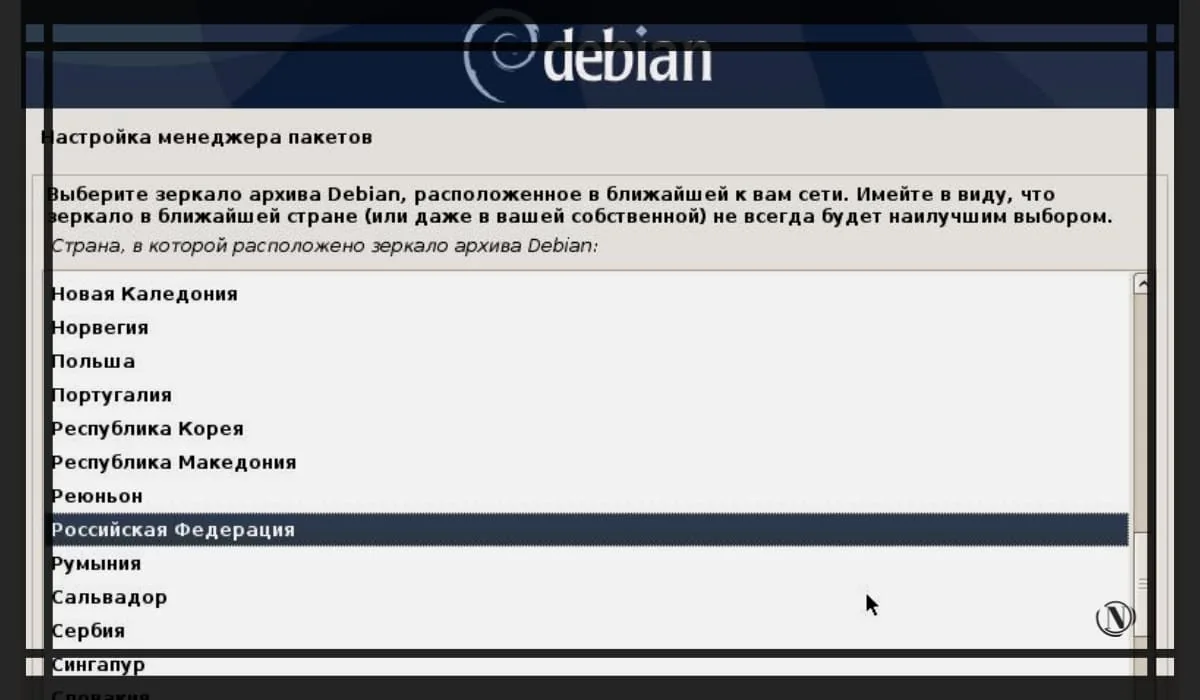
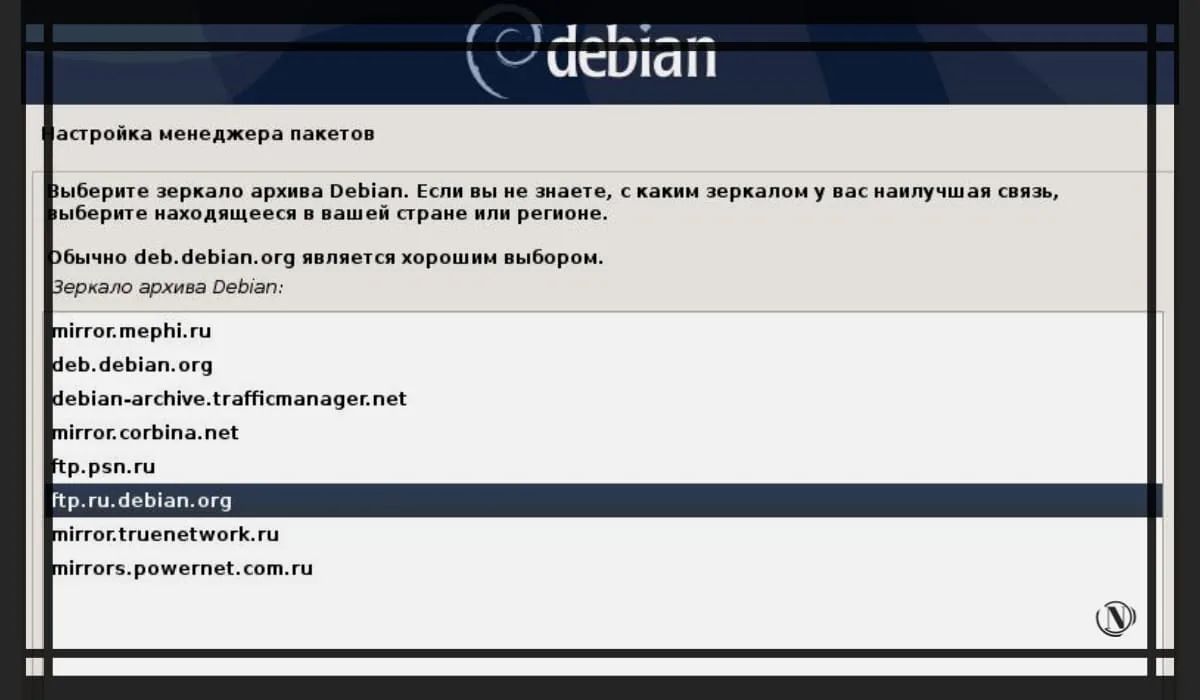
Select the appropriate software repository and click Continue. Here, at your discretion, you can choose other repositories, for example (deb.debian.org). Or you can choose the one in the picture. See image below:
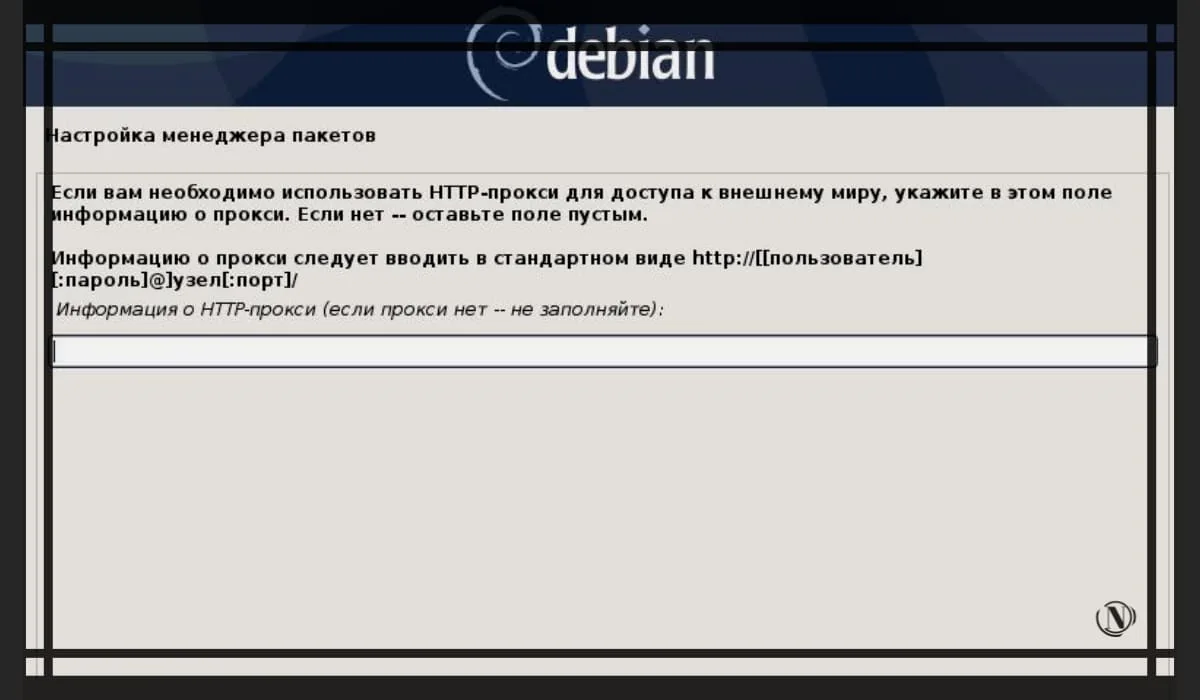
 At this stage, you should leave the field blank if your server has access to the Internet outside the local network. Click Continue.
Confirmation of participation in an anonymous survey on the use of distribution packages. At your discretion, select "Yes" or "No" and click on "Continue".

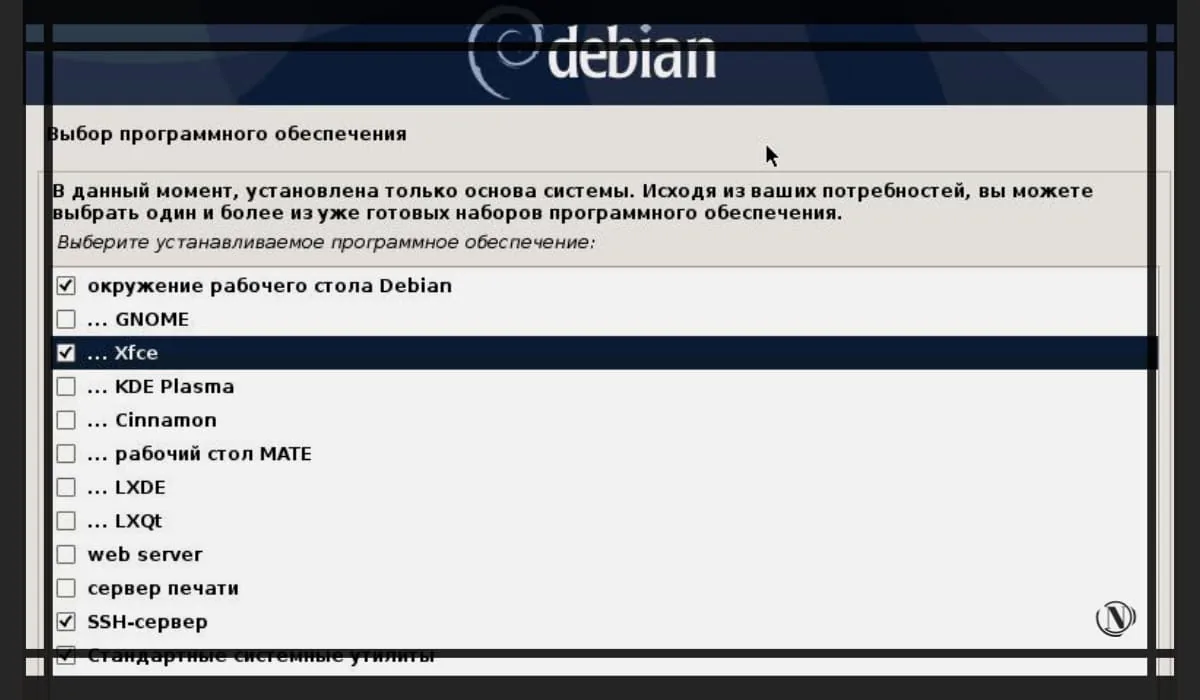
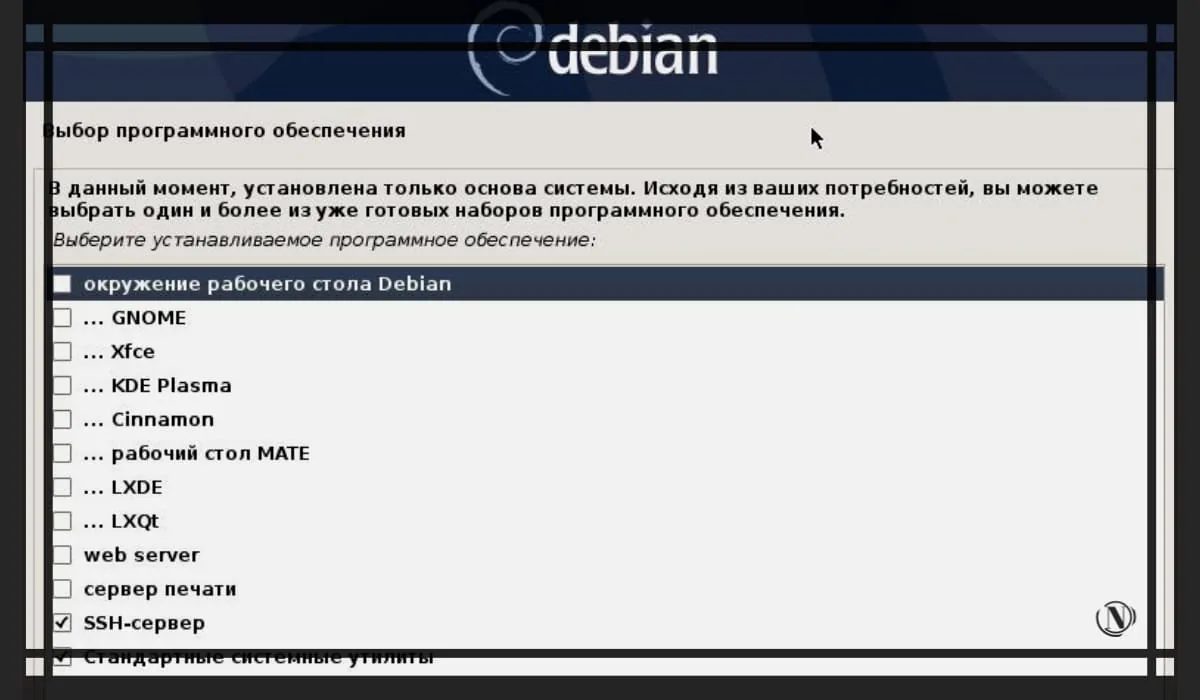
The next important step in the installation is the choice of a graphical desktop environment. Check the boxes "Debian desktop environment" and "Xfce", or other suggested graphical shell options (at your discretion). After that, check the boxes "SSH server" (this will allow you to connect to the server remotely) and "Standard system utilities" (standard software). Click on Continue. The graphical shell carries a certain load on your server, it suits me and does not bother me. See image below:
In the image below, the option without a graphical desktop shell is indicated. So that you have an understanding of what it looks like. You can use Debian in this configuration and in console mode. See image below:
Next, you need to wait for the installation process of the Debian distribution to complete. At this point, the required Debian packages are being installed.
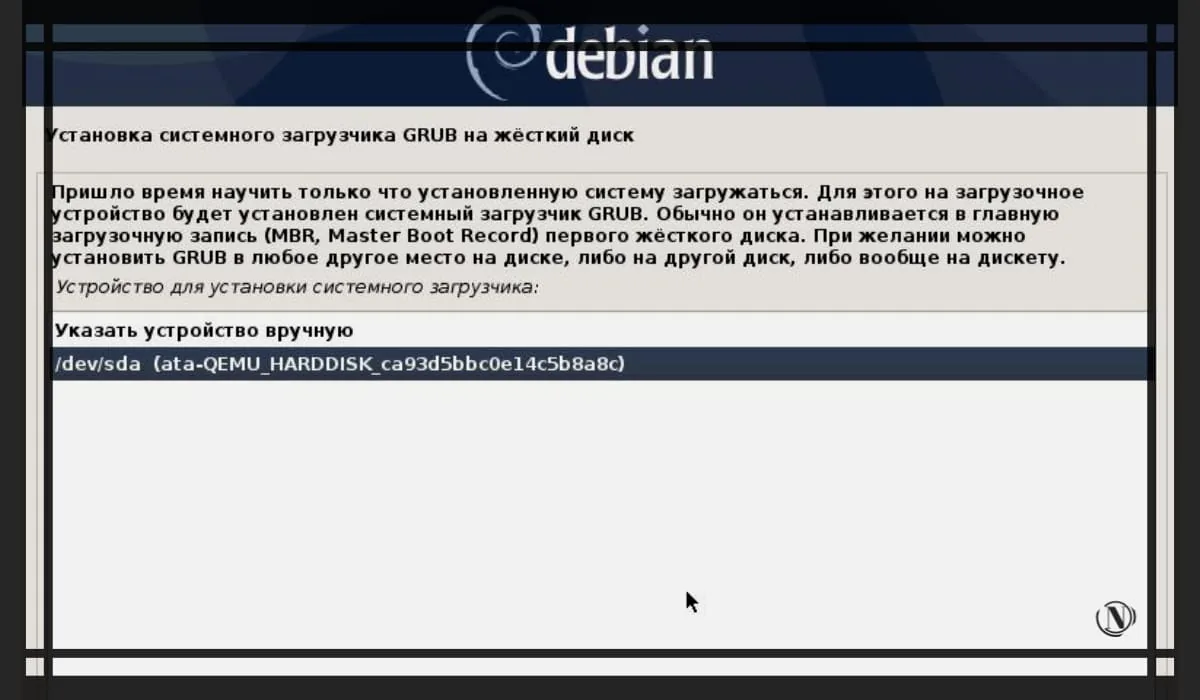
Installing the GRUB bootloader
In the next step, you need to select "Yes" to install the GRUB bootloader into the master boot record. Then click on the "Continue" button. The GRUB bootloader is an important component (without it, the system may not start).

At this stage, you need to select the disk device on which the GRUB bootloader will be installed, usually this device is highlighted in the list. Click on Continue.
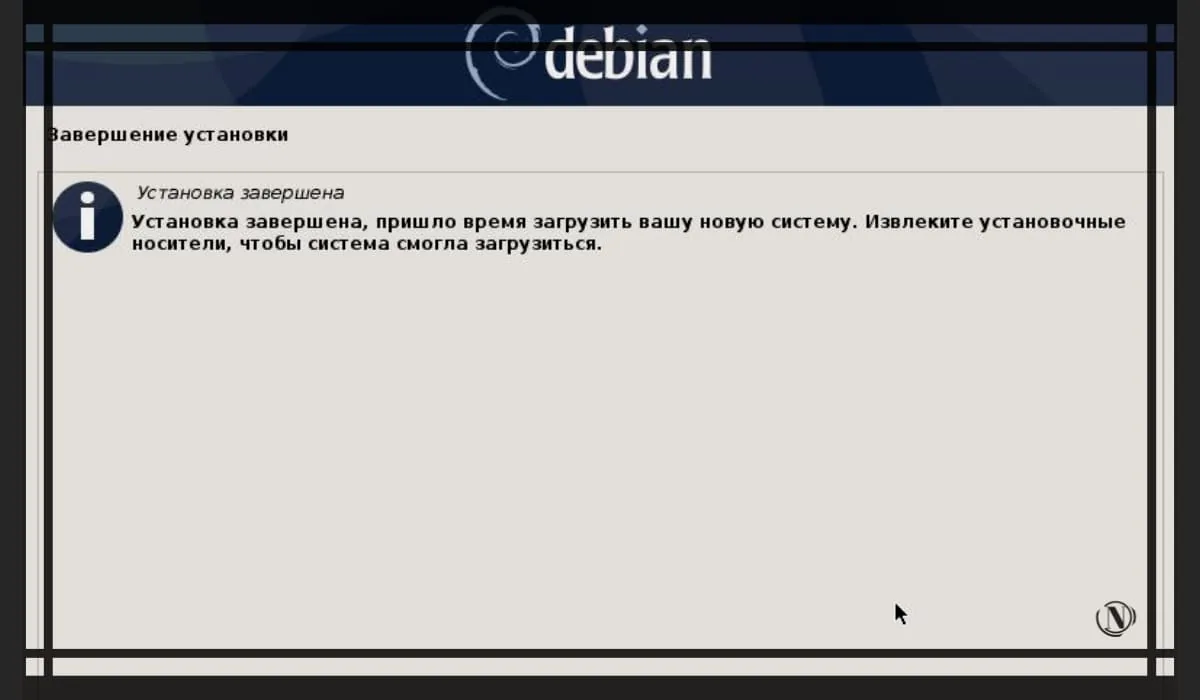
Installation is complete, click "Continue" and remove the flash drive or disk with ISO image. Next, you need to restart your PC or laptop (server hardware).
Conclusion
That's all! You have installed the Debian 10 Buster distribution. Next, extract the ISO image and reboot the server, after the OS will be launched.
Distribution installation completed. Now your server is almost ready to use. After booting up and logging in, you will need to do some basic system setup. After install server software or hosting panel. Here, at your discretion, which is more convenient to use for you, then choose. In the next guide, I will describe the installation of Debian 11, at the moment it is the latest stable distribution of this OS.
Reading this article:
Thanks for reading: SEO HELPER | NICOLA.TOP


Awesome guide, how do you manage to describe everything so constructively. I'm a fool, for the first time I was able to install this system myself. Even my husband didn't help, great guide and great illustrations of every step of installing Debian. Very convenient, I read from the phone and carried out the installation at the same time, following your recommendations. And voila, I put the OS on the PC myself. Husband fell down. I look forward to new guides from you, and preferably something to set up this system. Thanks a lot.
Vika, good afternoon) It's nice to read such comments. I am very glad that the information on my site turned out to be so useful and productive for you)))
I study materials on your site. Very interesting and varied content. I read about safety, the manuals are huge. How long does it take you to write? There are many questions about Debian. I tried to install on a laptop, but there is no wifi problem, and I suppose that to create my own server, only os is not enough right? I'm interested in your steps, what release of Debian are you using? What did you set up? Did you install the software for the server yourself or do you have something else? Were you able to install Debian the first time? I'm sorry, but there are many questions. I already read something using the example of creating a home server on your site. Everything is interesting, but superficial, it’s impossible to crank it out yourself. I ask you for specifics, please more materials on this topic. Thank you.
Dmitry, good afternoon. I answer your questions:
I tried to install on a laptop, but there is no wifi problem, and I suppose that to create my own server, only os is not enough right?
1. Yes, it’s really a wifi problem, I’ve come across it myself. But there are solutions to this problem online.
2. Yes, just the installed system is not enough. For a full-fledged server, you need to install additional software. It depends on your preferences what exactly you need.
I'm interested in your steps, what release of Debian are you using? What did you set up? Did you install the software for the server yourself or do you have something else? Were you able to install Debian the first time?
Installed and configured the system. I did a full setup, installed additional software, first I used the VestaCp hosting panel, at the moment I use the Hestia hosting panel. Added and updated packages in Debian (php, mariadb and others). No, not the first time, the problem is that when installing, for example, a hosting panel, unexpected errors may occur. It is impossible or very difficult to fix them, so you have to reinstall the system. It took me many attempts to get to a fully working server.
Thanks for the tutorial and informative articles.
Thank you)