Adding tags (tags) in WordPress
![]()
Hello everyone, today I will tell how to add tags (tags) to a post in wordpress. Adding tags on the site allows you to more widely display the topic of the entry, for each entry you can specify from one to seven tags. It's better not to fight))
The presence of skeins (tags) in site records, have a positive effect on the usability of the site content. They help website visitors to find additional information on the topic under study. Let's say I'm looking for information in a post on a specific topic, but I don't have enough data. In this case, I can refer to tags to find more information about my topic.
Let's move on to the instructions. There are two ways to add tags (tags) to the site. These options are very similar to adding categories to the site.
The content of the article:
- The first option is adding tags through the entry
- The second option is adding tags from the admin panel
The first option is to add tags to posts
You can add tags to any post on your site, even an existing one. Go to the post you would like to add tags to.
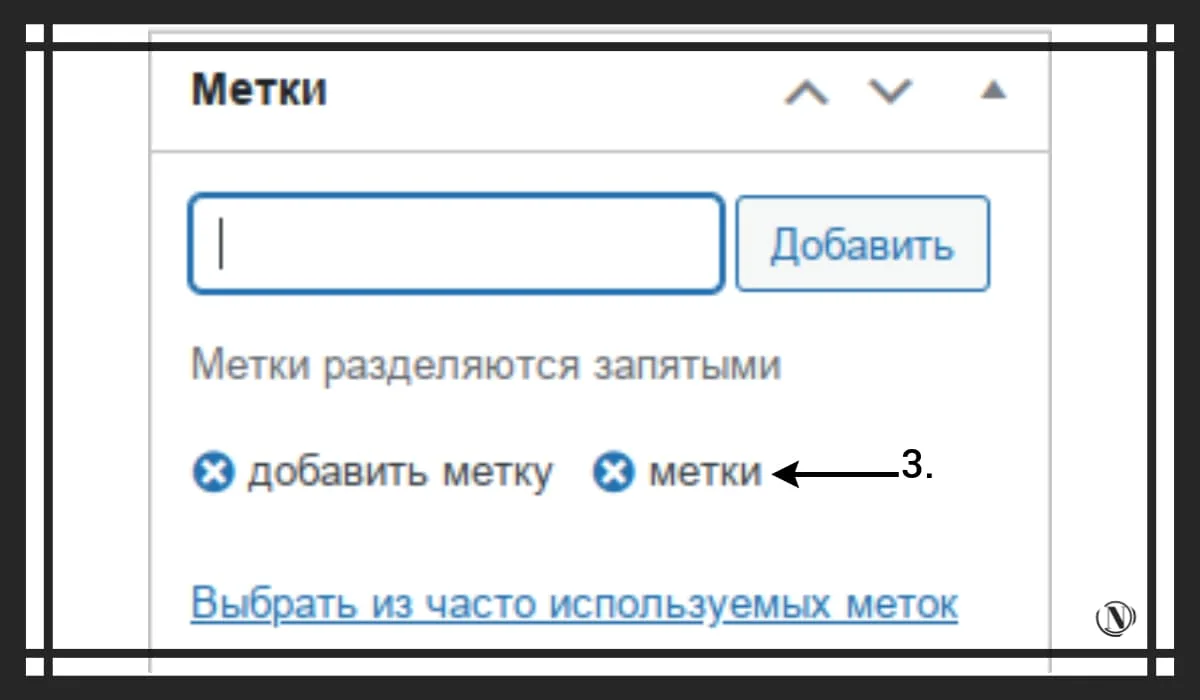
1. In the post editor, on the left side. Find a block Tags, in the block field, enter the labels you want add to entry, enter separated by commas.
2. Then, press the button Add, then update the record by clicking on the button Refresh.

3. After updating the record, the tags will automatically be linked to your post. For each tag, its own page will be created (like a heading) on which the tag (tag) entries will be displayed. You can remove tags from a recording very easily, just click on the cross next to the tag. You need to refresh the page again for the changes to take effect.
The second option is adding labels in the admin panel
This option is similar to the method of adding a rubric, the actions are very similar. Follow these steps:
1. In the admin panel menu, hover over the menu item Entries.
2. Then, in the drop-down list, click Tags.

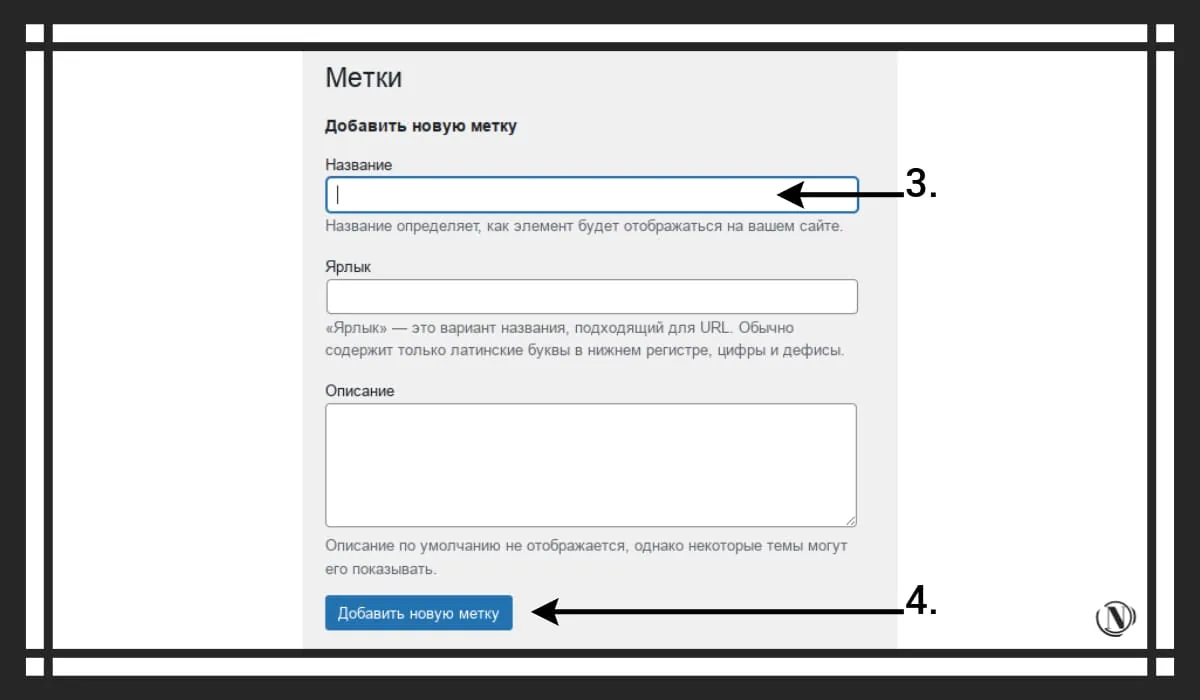
3. Enter the name of your label in the field.
4. Then click on the button Add new label.
Well done, new tag added. Here you can also remove tags or change them to your liking. To rename a label, hover over it and click Change. After changing the name, be sure to update the label. Changes are applied to the value of the label in all entries. Therefore, there is no need to change anything in the records.
Please note: tags (tags) - create low-quality pages, so they should be prohibited from indexing. But if you try really hard, you can turn it all to your advantage. How to do it?
When you edit a label, it has description which you can add. Describe the label, what topic it covers, and add an image to it. Thus, the label page will be claimed on request. Such tags can be easily indexed, thereby the site will be displayed for new queries.
Also, if you want to make beautiful design of tags on your site, try the Cool Tag Cloud plugin.
Conclusion
Tags are a great way to improve and reinforce the structure of your site. Expand the published topic as widely as possible. In the following tutorials, I will share information with you about changing the theme template, inserting a video on a page, and adding widgets to a site. I hope this article will be useful to you.
Reading this article:
Thanks for reading: SEO HELPER | NICOLA.TOP